Running Intel® Edge Insights for Industrial
Minimum System Requirements
The following are the minimum system requirements to run EII:
System Requirement |
Details |
|---|---|
Processor |
8th generation Intel® CoreTM processor onwards with Intel® HD Graphics or Intel® Xeon® processor |
RAM |
Minimum 16 GB |
Hard drive |
Minimum 256 GB |
Operating system |
Ubuntu 18.04 or Ubuntu 20.04 |
Note
To use EII, ensure that you are connected to the internet.
The recommended RAM capacity for video analytics pipeline is 16 GB. The recommended RAM for time-series analytics pipeline is 4 GB with Intel® Atom processors.
EII is validated on Ubuntu 18.04 and Ubuntu 20.04 but you can install EII stack on other Linux distributions with support for docker-ce and docker-compose tools.
Note
If running the EII device behind a HTTP proxy server, you will need to configure the proxy. It is recommended that you consult Docker’s instructions, which can be found at: https://docs.docker.com/network/proxy/.
Note
For the user that running behind a corporate proxy, you will need to setup the proxy for the host system in the /etc/environment file before proceeding to the installation step.
Downloading and Installation from Opensource Github Repository
All EII repos are accessible in github at link as can be seen in the snap below.

Please follow the below steps to quickly get the EII codebase. For more information on the various manifest files, please refer: README
Installing repo tool
curl https://storage.googleapis.com/git-repo-downloads/repo > repo
sudo mv repo /bin/repo
sudo chmod a+x /bin/repo
Pulling in the eii-manifests repo and using a manifest file
Create a working directory
mkdir -p <work-dir>
Initialize the repository using
repotool.cd <work-dir> repo init -u "https://github.com/open-edge-insights/eii-manifests.git"
Pull all the projects mentioned in the manifest xml file with the default/specific revision mentioned for each project
repo sync
EII Prerequisites installation
Note
Recommended
Docker CLI & Daemon versionis20.10.6Recommended
docker-compose versionis1.29.0
The script automates the installation & configuration of all the prerequisite software needed to be installed on a system with a freshly installed operating system to make the system ready for provisioning, building and running EII stack. These pre-requisite softwares include:
docker daemon
docker client
docker-compose
Python packages
The script checks if docker & docker-compose are already installed in the system. If not installed, then it installs the intended version of the docker & docker-compose which is mentioned in the script. If docker and/or docker-compose are already installed in the system but the installed version of the docker/docker-compose is older than the intended docker/docker-compose version (which is mentioned in the script) then the script uninstalls the older version of docker/docker-compose & re-installs the intended version mentioned in the script. The script also configures the proxy settings for docker client and docker daemon to connect to internet.
The build/pre_requisites.sh script also does proxy setting configuration for both system wide proxy & docker proxy. The script prompts for the proxy address to be entered by the user, if the system is behind a proxy.
The script also configures proxy setting system wide /etc/environment and for docker by taking the proxy value as user input if the system is running behind proxy. The proxy settings for /etc/apt/apt.conf is also set by this script to enable apt updates & installations.
Note:
It is recommended to install the required
docker-compose versionwhich is1.29.0. Older version of docker-compose binary less than 1.29.0 may not work with the video-usecase docker-compose.yml files. It is observed thatdevice_cgroup_rulescommand is not supported in certain docker-compose binaries versions less than1.29.0.If one still needs to use the older versions of docker-compose then
device_cgroup_rulescommand needs to be commented inia_video_ingestionandia_video_analyticsservice which could result in limited inference and device support.ia_video_ingestion: ... #device_cgroup_rules: #- 'c 189:* rmw' #- 'c 209:* rmw' After making changes to the docker-compose.yml file refer ``Using builder script`` section to re-run ``builder.py`` script before running the services using ``docker-compose up``
Steps to run the pre-requisites script is as follows:
$ cd [WORKDIR]/IEdgeInsights/build
$ sudo -E ./pre_requisites.sh --help

Usage :: sudo -E ./pre_requisites.sh [OPTION...]

List of available options...

--proxy         proxies, required when the gateway/edge node running EII (or any of EII profile) is connected behind proxy

--help / -h         display this help and exit

Note : If --proxy option is not provided then script will run without proxy

Different use cases...

                1. RUNS WITHOUT PROXY
                $sudo -E ./pre_requisites.sh


                2.RUNS WITH PROXY
                $sudo -E ./pre_requisites.sh --proxy="proxy.intel.com:891"
Optional: For enabling full security for production deployments, make sure host machine and docker daemon are configured with below security recommendations. build/docker_security_recommendation.md
Optional: If one wishes to enable log rotation for docker containers
There are two ways to configure logging driver for docker containers
Set logging driver as part of docker daemon (applies to all docker containers by default):
Configure
json-filedriver as default logging driver by following https://docs.docker.com/config/containers/logging/json-file/. Sample json-driver config which can be copied to/etc/docker/daemon.jsonis provided below.{ "log-driver": "json-file", "log-opts": { "max-size": "10m", "max-file": "5" } }
Reload the docker daemon
$ sudo systemctl daemon-reload
Restart docker .. code-block:
$ sudo systemctl restart docker
Set logging driver as part of docker compose which is conatiner specific and which always overwrites 1st option (i.e /etc/docker/daemon.json)
Example to enable logging driver only for video_ingestion service:
ia_video_ingestion:
    ...
    ...
    logging:
     driver: json-file
     options:
      max-size: 10m
      max-file: 5
Generating consolidated deployment and configuration files:
Note
- Whenever we make changes to individual EII app/service directories files as mentioned above in the description column
or in the build/.env file, it is required to re-run the
builder.pyscript before provisioning and running the EII stack to ensure that the changes done reflect in the required consolidated files.
- Manual editing of above consolidated files is not recommended and we would recommend to do the required changes to
respective files in EII app/service directories and use build/builder.py script to generate the conslidated ones.
- This eii_config.json script removes the subscriber or client interface for EII service/app(s) configuration in consolidated eii_config.json
if the corresponding publisher or server interface in any EII service/app(s) is missing based on the default
builder.pyexecution orbuilder.pyexecution with-fswitch. Please note if one runs into issues where the DNS server is being overwhelmed with DNS queries for the EII service/app name, most likely this would be happening if those EII services are intentionally stopped, please ensure to restart those EII services/app(s). If the intention is to not have that application/service running, please execute the ``builder.py`` by providing usecase yml file with that application/service not listed, so the corresponding subscriber/client interfaces from other EII service/app(s) are automatically removed before provisioning and deployment of EII stack. Please check `#running-builder-to-generate-the-above-listed-consolidated-files-for-a-subset-of-eii-services <#running-builder-to-generate-the-above-listed-consolidated-files-for-a-subset-of-eii-services>`__ for selectively choosing required EII services
EII is equipped with builder, a robust python tool to auto-generate the required configuration files to deploy EII services on single/multiple nodes. The tool is capable of auto-generating the following consolidated files by fetching the respective files from EII service directories which are required to bring up different EII use-cases:
file name |
Description |
|---|---|
docker-compose.yml |
Consolidated |
docker-compose.override.yml |
Consolidated |
docker-compose-build.yml |
Consolidated |
docker-compose-push.yml |
Consolidated |
eii_config.json |
Consolidated |
values.yaml |
Consolidated |
Template yaml files |
Files copied from helm/templates directory of every app to helm-eii/eii-deploy/templates directory, which are required to deploy EII services via helm |
Using builder script
Builder script usage:
$ python3 builder.py -h
usage: builder.py [-h] [-f YML_FILE] [-v VIDEO_PIPELINE_INSTANCES]
                    [-d OVERRIDE_DIRECTORY]

optional arguments:
    -h, --help            show this help message and exit
    -f YML_FILE, --yml_file YML_FILE
                        Optional config file for list of services to include.
                        Eg: python3 builder.py -f video-streaming.yml
                        (default: None)
    -v VIDEO_PIPELINE_INSTANCES, --video_pipeline_instances VIDEO_PIPELINE_INSTANCES
                        Optional number of video pipeline instances to be
                        created. Eg: python3 builder.py -v 6 (default:
                        1)
    -d OVERRIDE_DIRECTORY, --override_directory OVERRIDE_DIRECTORY
                        Optional directory consisting of of benchmarking
                        configs to be present in each app directory. Eg:
                        python3 builder.py -d benchmarking (default:
                        None)
Running builder to generate the above listed consolidated files for all applicable EII services
Builder will parse the top level directories under IEdgeInsights to generate the above listed consolidated files.
$ python3 builder.py
Running builder to generate the above listed consolidated files for a subset of EII services:
This is achieved by providing a yml file to Builder as config which has list of services to include. User can mention the service name as path relative to IEdgeInsights or Full path to the service in the config yml file.
If user wants to include only a certain number of services in the EII stack, he can opt to provide the -f or yml_file flag of builder.py to allow only the services provided in the yml file mentioned with the -f or yml_file. Few examples of such yml files for different usecases are provided at Azure, Azure, Azure etc.,
An example for running Builder with this flag is given below:
$ python3 builder.py -f usecases/video-streaming.yml
NOTE:
Main usecases: | Usecase | yaml file | | :— | :— | | Video + Timeseries | build/usecases/video-timeseries.yml | | Video | build/usecases/video.yml | | Timeseries | build/usecases/time-series.yml |
Video pipeline sub-usecases:
Usecase | yaml file |:— | :— |Video streaming | build/usecases/video-streaming.yml |Video streaming and historical | build/usecases/video-streaming-storage.yml |Video streaming with AzureBridge | build/usecases/video-streaming-azure.yml |Video streaming and custom udfs | build/usecases/video-streaming-all-udfs.yml|
Running builder to generate multi instance configs:
Based on the user’s requirements, builder can also generate multi-instance docker-compose.yml, config.json respectively.
If user wants to generate boiler plate config for multiple stream use cases, he can do so by using the -v or video_pipeline_instances flag of builder. This flag creates multi stream boiler plate config for docker-compose.yml, eii_config.json files respectively.
An example for running builder to generate multi instance boiler plate config for 3 streams of video-streaming use case has been provided below:
$ python3 builder.py -v 3 -f usecases/video-streaming.yml
Note
This multi-instance feature support of Builder works only for the video pipeline i.e., usecases/video-streaming.yml use case alone and not with any other use case yml files like usecases/video-streaming-storage.yml and so on. Also, it doesn’t work for cases without -f switch. In other words, only the above example works with -v taking in any +ve number. To learn more about using this feature with the DiscoverHistory tool, see Multi-instance feature support for the builder script with the DiscoverHistory tool.
Running builder to generate benchmarking configs:
If user wants to provide a different set of docker-compose.yml, config.json other than the ones present in every service directory, he can opt to provide the -d or override_directory flag which indicates to search for these required set of files within a directory provided by the flag. For example, if user wants to pick up these files from a directory named benchmarking, he can run the command provided below:
$ python3 builder.py -d benchmarking
Note
If using the override directory feature of builder, it is recommended to include set of all 3 files mentioned above. Failing to provide any of the files in the override directory results in builder not including that service in the generated final config.
If user wishes to spawn a single Subscriber/Client container subscribing/receiving on multiple Publisher/Server containers, he can do so by adding the AppName of Subscriber/Client container in subscriber_list of builder_config.json ensuring the Publisher/Server container AppName is added in the publisher_list of builder_config.json. For services not mentioned in subscriber_list, multiple containers specified by the -v flag are spawned. For eg: If builder is run with -v 3 option and Visualizer isn’t added in subscriber_list of builder_config.json, 3 Visualizer instances are spawned, each of them subscribing to 3 VideoAnalytics services. If Visualizer is added in subscriber_list of builder_config.json, a single Visualizer instance subscribing to 3 multiple VideoAnalytics is spawned.
Provision
By default EII is provisioned in Secure mode.
Follow below steps to provision. Provisioning must be done before deploying EII on any node. It will start ETCD as a container and load it with configuration required to run EII for single node or multi node cluster set up.
Please follow below steps to provision in Developer mode. Developer mode will have all security disabled.
Please update DEV_MODE=true in build/.env to provision in Developer mode.
Please re-run the build/builder.py to re-generate the consolidated files as mentioned above
Following actions will be performed as part of Provisioning
Loading initial ETCD values from json file located at
build/provision/config/eii_config.json.For Secure mode only, Generating ZMQ secret/public keys for each app and putting them in ETCD.
Generating required X509 certs and putting them in etcd.
All server certificates will be generated with 127.0.0.1, localhost and HOST_IP mentioned in build/.env.
If HOST_IP is blank in build/.env, then HOST_IP will be automatically detected when server certificates are generated.
Optional: In case of any errors during provisioning w.r.t existing volumes, please remove the existing volumes by running the EII uninstaller script: eii_uninstaller.sh
Run all the below commands in this section from [WORKDIR]/IEdgeInsights/build/provision directory.
Below script starts etcd as a container and provision. Please pass docker-compose file as argument, against which provisioning will be done.
$ cd [WORKDIR]/IEdgeInsights/build/provision
$ sudo -E ./provision.sh <path_to_eii_docker_compose_file>

$ # eq. $ sudo -E ./provision.sh ../docker-compose.yml
Optional: By default, the provisioning step will pull the provisioning images from docker registry. In case the user wants to build the images,
--buildflag should be provided in the provisioning command i.e.$ sudo -E ./provision.sh <path_to_eii_docker_compose_file> --build $ # eq. $ sudo -E ./provision.sh ../docker-compose.yml --buildNote The above command only
buildthe provisioining images, will not do any other functions of provisioning script.
Optional: For capturing the data back from Etcd to a JSON file, run the etcd_capture.sh script. This can be achieved using the following command:
$ ./etcd_capture.sh
Distribution of EII container images
EII services are available as pre-built container images in docker hub at https://hub.docker.com/u/openedgeinsights
Below are the list of pre-built container images that are accessible at https://hub.docker.com/u/openedgeinsights:
Provisioning images
openedgeinsights/ia_etcd_provision
openedgeinsights/ia_etcd
Common EII images applicable for video and timeseries use cases
openedgeinsights/ia_etcd_ui
openedgeinsights/ia_influxdbconnector
openedgeinsights/ia_rest_export
openedgeinsights/ia_opcua_export
Video pipeline images
openedgeinsights/ia_video_ingestion
openedgeinsights/ia_video_analytics
openedgeinsights/ia_web_visualizer
openedgeinsights/ia_visualizer
openedgeinsights/ia_imagestore
openedgeinsights/ia_azure_bridge
openedgeinsights/ia_azure_simple_subscriber
Timeseries pipeline images
openedgeinsights/ia_grafana
Additionally, we have openedgeinsights/ia_edgeinsights_src image available at the above docker hub
location which consists of source code of GPL/LGPL/AGPL components of EII stack.
For the EII docker images not listed on docker hub at above location, one needs to do the build from source
before running docker-compose up -d command or bringing up the pod in kubernetes cluster on the build/development
node.
Eg:
$ # Update the DOCKER_REGISTRY value in [WORKDIR]/IEdgeInsights/build/.env as DOCKER_RESISTRY=<docker_registry> (Make sure `docker login <docker_registry>` to the docker reigstry works)
$ cd [WORKDIR]/IEdgeInsights/build
$ # Base images that needs to be built
$ docker-compose -f docker-compose-build.yml build ia_eiibase
$ docker-compose -f docker-compose-build.yml build ia_common
$ # Assuming here that the `python3 builder.py` step is been executed and ia_kapacitor
$ # service exists in the generated compose files and also, provisioning step is done
$ docker-compose -f docker-compose-build.yml build ia_kapacitor
$ docker-compose up -d
$ # Push all the applicable EII images to <docker_registry>. Ensure to use the same DOCKER_REGISTRY value on the deployment machine while deployment
$ docker-compose -f docker-compose-push.yml push
List of All EII Services
EII stack comes with following services, which can be included/excluded in docker-compose file based on requirements.
Common EII services
OpcuaExport - Optional service to read from VideoAnalytics container to publish data to opcua clients
RestDataExport - Optional service to read the metadata and image blob from InfluxDBConnector and ImageStore services respectively
Dev mode and Profiling mode
Dev Mode
Starting the EII in Dev ModeDev mode eases the development phase for System Integrator (SI). This mode can be enabled by setting the environment variable dev_mode to true in the [WORK_DIR]/IEdgeInsights/build/.env file. The default value of this variable is false.
Starting the EII in Dev Mode
All components will communicate over non-encrypted channels in dev mode.
Note
The user should not use this mode in a production environment because the security features have been disabled in this mode.
Profiling Mode
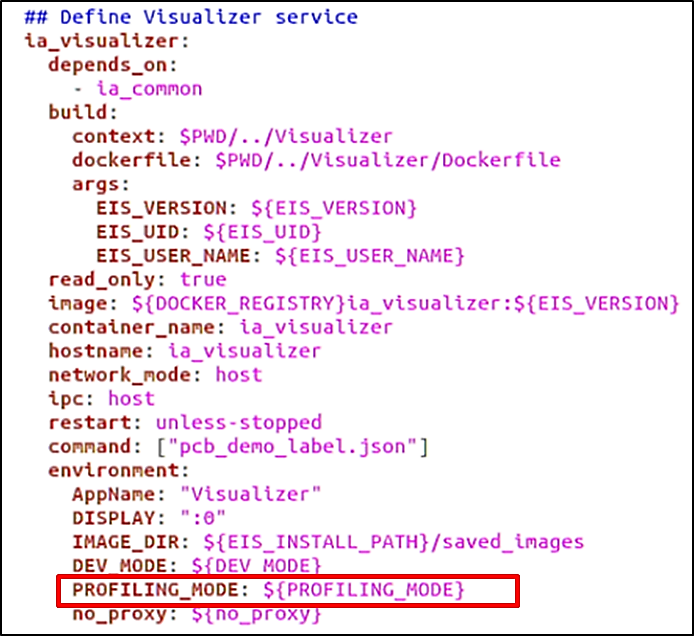
Profiling mode is used to gather performance statistics. In this mode, each EII component makes a record of the time needed for processing any single frame. These statistics are gathered in the visualizer where the SI can see the end-to-end processing time for individual frames, as well as the end-to-end average time. To enable profiling mode in EII, set the environment variable PROFILING in the [WORK_DIR]/IEdgeInsights/build/.env file to true.
For each EII services defined in the [WORK_DIR]/IEdgeInsights/build/docker-compose.yml file, there is an ENV to determine whether PROFILING should be enabled based on the setting in the [WORK_DIR]/IEdgeInsights/build/.env file. Figure 52 provides an example from the Visualizer service.
Build and Run EII video/timeseries use cases
Note
- For running EII services in IPC mode, make sure that the same user should be there in publisher and subscriber.
If publisher is running as root (eg: VI, VA), then the subscriber also need to run as root. In
build/docker-compose.ymlifuser: ${EII_UID}is in publisher service, then the sameuser: ${EII_UID}has to be in subscriber service. If the publisher doesn’t have the user specified like above, then the subscriber service should not have that too.
If services needs to be running in multiple nodes in TCP mode of communication, msgbus subscribers and clients of
AppNameare required to configure the “EndPoint” in config.json with HOST_IP and PORT under “Subscribers/Publishers” or “Clients/Servers” interfaces section.- Make sure the PORT is being exposed in
build/docker-compose.ymlof the respectiveAppName Eg: If the
"EndPoint": <HOST_IP>:65012is configured inconfig.json, then expose the port 65012 inbuild/docker-compose.ymlof the serviceia_video_ingestion
- Make sure the PORT is being exposed in
```yaml
  ia_video_ingestion:
    ...
    ports:
      - 65012:65012
```
All the below EII build and run commands needs to be executed from the [WORKDIR]/IEdgeInsights/build/ directory.
Below are the usecases supported by EII to bring up the respective services mentioned in the yaml file.
Users can refer to section EII pre-requisites to generate the docker_compose.yml file based on the specific user case. For more detail information and configuration, you can refer to the [WORK_DIR]/IEdgeInsights/README file.
Build EII stack
Note
This step is optional if one wants to use the EII pre-built container images itself and doesn’t want to build from source. For more details, refer: Distribution of EII container images
Base EII services like ia_eiibase, ia_video_common etc., are required only at the build time and not at the runtime.
Builds all EII services in the build/docker-compose-build.yml along with the base EII services.
$ docker-compose -f docker-compose-build.yml build
If any of the services fails during build, it can be built using below command
$ docker-compose -f docker-compose-build.yml build --no-cache <service name>
Run EII services
Note
If the images tagged with EII_VERSION as in build/.env does not exist locally on the system,
they would be pulled if those images exist int he docker hub during docker-compose up.
Runs all the EII services in the build/docker-compose.yml
$ xhost +
$ docker-compose up -d
A successful run will open Visualizer UI with results of video analytics for all video usecases.
Push required EII images to docker registry
Note
By default, the images gets published to hub.docker.com if DOCKER_REGISTRY is empty in build/.env. Please make sure to take off
openedgeinsights/ org from the image name(s) while pushing to docker hub as it doesn’t support repository/image name having multiple slashes.
This limitation doesn’t exist in other docker registries like Azure Container Registry(ACR), Harbor registry etc.,
Pushes all the EII service docker images in the build/docker-compose-push.yml. Ensure to update the DOCKER_REGISTRY value in .env file.
$ docker-compose -f docker-compose-push.yml push
EII multi node cluster provision and deployment
Without orchestrator
By default EII is provisioned with single node cluster.
[
Recommended] Deploy on multiple nodes automatically through ansible playbook.
Ansible based EII Prequisites setup, provisioning, build & deployment
Ansible is the automation engine which can enable EII deployment across single/multi nodes. We need one control node where ansible is installed and optional hosts. We can also use the control node itself to deploy EII
Note
Ansible can execute the tasks on control node based on the playbooks defined
There are 3 types of nodes - control node where ansible must be installed, EII leader node where ETCD server will be running and optional worker nodes, all worker nodes remotely connect to ETCD server running on leader node. Control node and EII leader node can be same.
Installing Ansible on Ubuntu {Control node}
Execute the following command in the identified control node machine. .. code-block:: sh
$ sudo apt update $ sudo apt install software-properties-common $ sudo apt-add-repository –yes –update ppa:ansible/ansible $ sudo apt install ansible
Prerequisite step needed for all the control/worker nodes.
Generate SSH KEY for all nodes
Generate the SSH KEY for all nodes using following command (to be executed in the only control node), ignore to run this command if you already have ssh keys generated in your system without id and passphrase,
$ ssh-keygen
Note
Dont give any passphrase and id, just press Enter for all the prompt which will generate the key.
For Eg.
$ ssh-keygen

Generating public/private rsa key pair.
Enter file in which to save the key (/root/.ssh/id_rsa):  <ENTER>
Enter passphrase (empty for no passphrase):  <ENTER>
Enter same passphrase again:  <ENTER>
Your identification has been saved in ~/.ssh/id_rsa.
Your public key has been saved in ~/.ssh/id_rsa.pub.
The key fingerprint is:
SHA256:vlcKVU8Tj8nxdDXTW6AHdAgqaM/35s2doon76uYpNA0 root@host
The key's randomart image is:
+---[RSA 2048]----+
|          .oo.==*|
|     .   .  o=oB*|
|    o . .  ..o=.=|
|   . oE.  .  ... |
|      ooS.       |
|      ooo.  .    |
|     . ...oo     |
|      . .*o+.. . |
|       =O==.o.o  |
+----[SHA256]-----+
Updating the leader & worker node’s information for using remote hosts
Note
By default both control/leader node ansible_connection will be localhost in single node deployment.
Please follow below steps to update the details of leader/worker nodes for multi node scenario.
Update the hosts information in the inventory file
hosts[group_name] <nodename> ansible_connection=ssh ansible_host=<ipaddress> ansible_user=<machine_user_name>
For Eg:
[targets]
leader ansible_connection=ssh ansible_host=192.0.0.1  ansible_user=user1
Note
ansible_connection=sshis mandatory when you are updating any remote hosts, which makes ansible to connect viassh.The above information is used by ansible to establish ssh connection to the nodes.
control node will always be
ansible_connection=local, don’t update the control node’s informationTo deploy EII in single ,
ansible_connection=localandansible_host=localhostTo deploy EII on multiple nodes, add hosts(worker1, worker2 etc..) details to the inventory file
Non-orchestrated multi node deployment (without k8s)
Below configuration changes need to be made for multi node deployment without k8s
Set
multi_node: trueingroup_vars/all.ymlto enable multinode deployment andfalseto enable single node deployment. Updatevars/vars.ymlto the services to run on a specific node in case of multi_node deployment by following this, where in single node deployment all the services based on theusecasechosen will be deployed.Update
dockerregistry details in following section if using a custom/private registry .. code-block:: shdocker_registry=”<regsitry_url>” docker_login_user=”<username>” docker_login_passwd=”<password>”
Note Use of
docker_registryandbuildflagsUpdate
docker_registrydetails to use docker images from custom registry, optionally setbuild: trueto push docker images to this registryUnset
docker_registrydetails if you don’t want to use custom registry and setbuild: trueto save and load docker images from one node to another node
If you are using images from docker hub, then set
build: falseand unsetdocker_registrydetails
Select EII services to run on a particular node in multinode deployment
Edit
vars/vars.yml-> undernodesadd a specific a node which was defined in the inventory file(hosts) and add EII services toinclude_serviceslistEg. if you want leader to run ia_video_ingestion,
vars/vars.ymlshould benodes: leader: include_services: - ia_video_ingestionIf you want to add
worker1tonodesand bring upia_visualizerinworker1:nodes: leader: include_services: - ia_video_ingestion worker1: include_services: - ia_visualizer
Note
If a service is not added to include_services list, that service will not deployed on a particular node
Execute ansible Playbook from [EII_WORKDIR]/IEdgeInsights/build/ansible {Control node} to deploy EII services in single/multi nodes
Note
Updating messagebus endpoints to connect to interfaces is still the manual process. Make sure to update Application specific endpoints in
[AppName]/config.jsonAfter
pre-requisitesare successfully installed, please do logout and login to apply the changes
For Single Point of Execution
Note
: This will execute all the steps of EII as prequisite, build, provision, deploy & setup leader node for multinode deployement usecase in one shot sequentialy.
  ```sh
  $ ansible-playbook eii.yml
  ```


**Below steps are the individual execution of setups.**
Load
.envvalues from template$ ansible-playbook eii.yml --tags "load_env"For EII Prequisite Setup
$ ansible-playbook eii.yml --tags "prerequisites"Note After
pre-requisitesare successfully installed, please do logout and login to apply the changesTo generate builder and config files, build images and push to registry
$ ansible-playbook eii.yml --tags "build"To generate Certificates in control node
$ ansible-playbook eii.yml --tags "gen_certs"To generate provision bundle for leader
$ ansible-playbook eii.yml --tags "gen_leader_provision_bundle"To generate provision bundle for worker nodes
$ ansible-playbook eii.yml --tags "gen_worker_provision_bundle"To generate eii bundles for leader, worker nodes
$ ansible-playbook eii.yml --tags "gen_bundles"Provision leader and bring up ETCD server
$ ansible-playbook eii.yml --tags "leader_provision"Provision worker node
$ ansible-playbook eii.yml --tags "worker_provsion"Provision EIS Config values to etcd
$ ansible-playbook eii.yml --tags "etcd_provision"To generate deploy selected services to leader, worker nodes
$ ansible-playbook eii.yml --tags "deploy"
Deploying EII Using Helm in Kubernetes (k8s) environment
Note
To Deploy EII using helm in k8s aenvironment,
k8ssetup is a prerequisite.You need update the
k8sleader machine as leader node inhostsfile.Non
k8sleader machine thehelmdeployment will fail.For
helmdeploymentansible-multinodeparameters will not applicable, Since node selection & pod selection will be done byk8sorchestrator.Make sure you are deleting
/opt/intel/eii/datawhen switch fromprodmode todevmode in all yourk8sworkernodes.
Update the
DEPLOYMENT_MODEflag ask8singroup_vars/all.ymlfile:Open
group_vars/all.ymlfile .. code-block:: sh$ vi group_vars/all.yml
Update the
DEPLOYMENT_MODEflag ask8s## Deploy in k8s mode using helm DEPLOYMENT_MODE: "k8s"
Save & Close
For Single Point of Execution
Note This will execute all the steps of EII as prequisite, build, provision, deploy for a usecase in one shot sequentialy.
$ ansible-playbook eii.yml
Note
Below steps are the individual execution of setups.
Load
.envvalues from template$ ansible-playbook eii.yml --tags "load_env"For EII Prequisite Setup
$ ansible-playbook eii.yml --tags "prerequisites"For building EII containers
$ ansible-playbook eii.yml --tags "build"To generate Certificates in control node
$ ansible-playbook eii.yml --tags "gen_certs"Prerequisites for deploy EII using Ansible helm environment.
$ ansible-playbook eii.yml --tags "helm_k8s_prerequisites"Provision & Deploy EII Using Ansible helm environment .. code-block:: sh
$ ansible-playbook eii.yml –tags “helm_k8s_deploy”
In order to deploy EII on multiple nodes using docker registry and provision ETCD, please follow build/deploy/README.md.
With k8s orchestrator
One of the below options could be tried out:
[
Recommended] For deploying through ansible playbook on multiple nodes automatically, please refer build/ansible/README.mdUse helm charts to provision the node and deploy EII services
EII provision and deployment
For deployment of EII, helm charts are provided for both provision and deployment.
Note
:
Same procedure has to be followed for single or multi node.
Please login/configure docker registry before running helm. This would be required when not using public docker hub for accessing images.
Pre requisites
Note:
K8s installation on single or multi node should be done as pre-requisite to continue the following deployment. Please note we have tried the kubernetes cluster setup with
kubeadm,kubectlandkubeletpackages on single and multi nodes withv1.22.2. One can refer tutorials like https://adamtheautomator.com/install-kubernetes-ubuntu/#Installing_Kubernetes_on_the_Master_and_Worker_Nodes and many other online tutorials to setup kubernetes cluster on the web with host OS as ubuntu 18.04/20.04.For helm installation, please refer helm website
For preparing the necessary files required for the provision and deployment, user needs to execute the build and provision steps on an Ubuntu 18.04 / 20.04 machine. Follow the Docker pre-requisites, EII Pre-requisites, Provision EII and Build and Run EII mentioned in README.md on the Ubuntu dev machine.
To run EII services with helm in fresh system where EII services are going to run for the first time(no
eiiuseris present on that system), user needs to run below steps:Create EII user if not exists: .. code-block:: sh
$ set -a $ source ../.env $ set +a $ sudo groupadd $EII_USER_NAME -g $EII_UID $ sudo useradd -r -u $EII_UID -g $EII_USER_NAME $EII_USER_NAME
Create required directory and change ownership to EII user .. code-block:: sh
$ sudo mkdir -p $EII_INSTALL_PATH/data/influxdata $ sudo mkdir -p $EII_INSTALL_PATH/sockets/ $ sudo chown -R $EII_USER_NAME:$EII_USER_NAME $EII_INSTALL_PATH
Execute builder.py with the preferred usecase for generating the consolidated helm charts for the provisioning and deployment. As EII don’t distribute all the docker images on docker hub, one would run into issues of those pods status showing
ImagePullBackOffand few pods status like visualizer, factory ctrl etc., showingCrashLoopBackOffdue to additional configuration required. ForImagePullBackOffissues, please follow the steps mentioned at [../README.md#distribution-of-eii-container-images]> (../README.
md#distribution-of-eii-container-images) to push the images that are locally built to the docker registry of choice. Please ensure to update theDOCKER_REGISTRYvalue in[WORKDIR]/IEdgeInsights/build/.envfile and re-run the ../builder.py script to regenerate the helm charts for provision and deployment.
Update the helm charts directory
Copy the docker-compose.yml, eii_config.json into the eii-provision helm chart. .. code-block:: sh
$ cd [WORKDIR]/IEdgeInsights/build $ cp docker-compose.yml provision/config/eii_config.json helm-eii/eii-provision/
To generate only Certificates by provisioning. .. code-block:: sh
$ cd [WORKDIR]/IEdgeInsights/build/provision $ sudo -E ./provision.sh ../docker-compose.yml –generate_certs
Copy the Certificates generated by provisioning process to the eii-provision helm chart. .. code-block:: sh
$ cd [WORKDIR]/IEdgeInsights/build $ sudo chmod -R 755 provision/Certificates/ $ cp -a provision/Certificates/ helm-eii/eii-provision/
Note: The Certificates/ directory contains sensitive information. So post the installation of eii-provision helm chart, it is recommended to delete the Certificates from it.
Provision and deploy in the kubernetes node.
Copy the helm charts in helm-eii/ directory to the node.
Install provision helm chart
$ cd [WORKDIR]/IEdgeInsights/build/helm-eii/
$ helm install eii-provision eii-provision/
Verify the pod is in running state:
$ kubectl get pods

NAME                       READY   STATUS    RESTARTS   AGE
ia-etcd-58866469b9-dl66k   2/2     Running   0          8s
Install deploy helm chart
$ cd [WORKDIR]/IEdgeInsights/build/helm-eii/
$ helm install eii-deploy eii-deploy/
Verify all the pod are running:
$ kubectl get pods

NAME                                          READY   STATUS    RESTARTS   AGE
deployment-etcd-ui-6c7c6cd769-rwqm6           1/1     Running   0          11s
deployment-video-analytics-546574f474-mt7wp   1/1     Running   0          11s
deployment-video-ingestion-979dd8998-9mzkh    1/1     Running   0          11s
deployment-webvisualizer-6c9d56694b-4qhnw     1/1     Running   0          11s
ia-etcd-58866469b9-dl66k                      2/2     Running   0          2m26s
The EII is now successfully deployed.
For running helm charts and deploying kube pods with specific namespace
Note
: By default all our helm charts are deployed with default namespace, below commands will help us to deploy helm chart and kube pods with specific namespace
     helm install --set namespace=<namespace> <helm_app_name> <helm_charts_directory>/ --namespace <namespace> --create-namespace

For Eg.:
For Deploying
eii-provisionhelm chart witheiinamespace. .. code-block:: shhelm install –set namespace=eii eii-provision eii-provision/ –namespace eii –create-namespace
For Deploying
eii-deployhelm chart witheiinamespace. .. code-block:: shhelm install –set namespace=eii eii-deploy eii-deploy/ –namespace eii –create-namespace
Now all the
podsandhelmcharts are deployed undereiinamespaceFor listing
helm chartsdeployed with specific namespace .. code-block:: shhelm ls -n <namespace>
For listing
kube podsdeployed with specific namespace .. code-block:: shkubectl get pods -n <namespace>
Provision and deploy mode in times switching between dev and prod mode OR changing the usecase
Set the DEV_MODE as “true/false” in .env depending on dev or prod mode.
Run builder to copy templates file to eii-deploy/templates directory and generate consolidated values.yaml file for eii-services:
$ cd [WORKDIR]/IEdgeInsights/build
$ python3 builder.py -f usecases/<usecase>.yml
Remove the etcd storage directory
$sudo rm -rf /opt/intel/eii/data/*
Do helm install of provision and deploy charts as per previous section.
Note
:
During re-deploy(helm uninstall and helm install) of helm chart for eii-provision and eii-deploy wait for all the pervious pods to terminated successfully.
Steps to enable Accelarators
Note
:
nodeSelector is the simplest recommended form of node selection constraint.
nodeSelector is a field of PodSpec. It specifies a map of key-value pairs. For the pod to be eligible to run on a node, the node must have each of the indicated key-value pairs as labels (it can have additional labels as well). The most common usage is one key-value pair.
Setting the
labelfor a particular node$ kubectl label nodes <node-name> <label-key>=<label-value>For HDDL/NCS2 dependenecies follow the steps for setting
labels.For HDDL
$ kubectl label nodes <node-name> hddl=true
For NCS2
kubectl label nodes <node-name> ncs2=true
Note
: Here the node-name is your worker node machine hostname
Open the
[WORKDIR]/IEdgeInsights/VideoIngestion/helm/values.yamlor[WORKDIR]/IEdgeInsights/VideoAnalytics/helm/values.yamlfile.Based on your workload preference. Add hddl or ncs2 to accelerator in values.yaml of video-ingestion or video-analytics.
For HDDL
config:
 video_ingestion:
    .
    .
    .
   accelerator: "hddl"
   .
   .
   .
For NCS2
config:
 video_ingestion:
    .
    .
    .
   accelerator: "ncs2"
   .
   .
   .
set device as “MYRIAD” in case of ncs2 and as HDDL in case of hddl in the VA config
In case of ncs2.
"udfs": [{
 .
 .
 .
 "device": "MYRIAD"
 }]
In case of hddl.
"udfs": [{
 .
 .
 .
 "device": "HDDL"
 }]
Run the
[WORKDIR]/IEdgeInsights/build/builder.pyfor generating latest consolidateddeployyml file based on yournodeSelectorchanges set in the respective Modules.cd [WORKDIR]/IEdgeInsights/build/ python3 builder.py
Follow the Deployment Steps
Verify the respecitve workloads are running based on the
nodeSelectorconstraints.
Steps for Enabling GiGE Camera with helm
- Note: For more information on
Multusplease refer this git https://github.com/intel/multus-cni Skip installing multus if it is already installed.
Prequisites For enabling gige camera with helm. Helm pod networks should be enabled
MultusNetwork Interface to attach host system network interface access by the pods for connected camera access.Note: Please follow the below steps & make sure
dhcp daemonis running fine.If there is an error onmacvlancontainer creation on accessing the socket or if socket was not running. Please execute the below steps again$ sudo rm -f /run/cni/dhcp.sock $ cd /opt/cni/bin $ sudo ./dhcp daemon### Setting up Multus CNI and Enabling it.
Multus CNI is a container network interface (CNI) plugin for Kubernetes that enables attaching multiple network interfaces to pods. Typically, in Kubernetes each pod only has one network interface (apart from a loopback) – with Multus you can create a multi-homed pod that has multiple interfaces. This is accomplished by Multus acting as a “meta-plugin”, a CNI plugin that can call multiple other CNI plugins.
Get the name of the
ethernetinterface in which gige camera & host system connected Note: Identify the network interface name by following command
$ ifconfig
Execute the Following Script with Identified
ethernetinterface name as Argument forMultus Network SetupNote: Pass theinterfacename withoutquotes
$ cd [WORKDIR]/IEdgeInsights/build/helm-eii/gige_setup
$ sudo -E sh ./multus_setup.sh <interface_name>
Note: Verify
multuspod is inRunningstate$ kubectl get pods --all-namespaces | grep -i multusSet gige_camera to true in values.yaml
$ vi [WORKDIR]/IEdgeInsights/VideoIngestion/helm/values.yaml
.
.
.
gige_camera: true
.
.
.
Follow the Deployment Steps
Verify
podip &hostip are same as per ConfiguredEthernetinterface by using below command.
$ kubectl -n eii exec -it <pod_name> -- ip -d addressNote:
User needs to deploy as root user for MYRIAD(NCS2) device and GenICam USB3.0 interface cameras.
apiVersion: apps/v1
kind: Deployment
...
spec:
    ...
    spec:
      ...
      containers:
        ....
        securityContext:
          runAsUser: 0
Accessing Web Visualizer and EtcdUI
Environment EtcdUI & WebVisualizer will be running in Following ports.
EtcdUI
https://master-nodeip:30010/
WebVisualizer
PROD Mode –
https://master-nodeip:30007/DEV Mode –
http://master-nodeip:30009/
EII Uninstaller
The uninstaller script automates the removal of all the EII Docker configuration installed on a system. This uninstaller will perform the following tasks:
Stops and removes all EII running and stopped containers
Removes all EII docker volumes
Removes all EII docker images [Optional]
Removes all EII install directory
Run the below commmand from [WORKDIR]/IEdgeInsights/build/ directory.
$ ./eii_uninstaller.sh -h
Usage: ./eii_uninstaller.sh [-h] [-d]

 This script uninstalls previous EII version.
 Where:
    -h show the help
    -d triggers the deletion of docker images (by default it will not trigger)

 Example:
  1) Deleting only EII Containers and Volumes
    $ ./eii_uninstaller.sh

  2) Deleting EII Containers, Volumes and Images
    $ export EII_VERSION=2.4
    $ ./eii_uninstaller.sh -d
    above example will delete EII containers, volumes and all the docker images having 2.4 version.
Debugging
Debugging Through the Logs
For any service run in the EII stack, please use docker logs -f <service_name>
working with EII Docker* Containers
EII sets up the Docker containers using the docker-compose tool. If only minor changes are made in the user-defined functions without adding any new files, user can just restart the specific docker container by running $ docker restart <Cointainer_ID> in the build directory without rebuilding the whole EII container.
Other useful commands when using the make tool are:
docker-compose build : Will build the images for EII components, however will not start the EII
docker-compose up –build : Will build the images for EII components and starts EII
docker-compose up : Will starts EII.
docker-compose down : Will stop the EII.
Compose Files
Docker compose is a tool used to define and run multiple container applications using Docker. It is a wrapper around Docker that is responsible for creating a network and adding the containers to that network. By default, the bridge network is used, unless otherwise specified in the docker-compose.yml or docker-compose.yaml file.
More details about the docker-compose and docker-compose.yml files is available at
Useful Docker* Commands
The following list includes the most used docker-compose commands. These commands should come in handy during development and debugging of the EII stack:
docker-compose build Builds all the service containers at the same time. To build a single service container, use docker-compose build [serv_cont_name].
This command generates several EII images. The docker images | grep ia | sort command can be used to see a list of these images.
Note
If any source files are modified, the docker-compose build command must be re-run to see the changes reflected within the container.
docker-compose down Stops and removes the service containers. Also, removes the Docker network.
docker-compose up d Brings up the service containers in detached mode (-d) by picking up the changes made in the docker-compose.yml file. It creates a Docker network and joins these containers to it.
Note
Use the following command to see the list of running EII containers: docker ps:
docker-compose logs -f Blocking process to see the Docker logs of all the containers. To see the logs for a single container, use docker logs f [serv_cont_name].
To run the Docker images separately, use the command: docker-compose run –no-deps [service_cont_name].
For example: docker-compose run –name ia_video_ingestion –no-deps ia_video_ingestion
Will run only the Video Ingestion container (the switch –no-deps will not bring up the dependencies configured in the docker-compose file).
If the container is not launching correctly, there could be an issue with the containers entrypoint program which can be overridden by providing the extra switch –entrypoint /bin/bash before the service container name in the docker-compose run command above. This creates a shell inside the container to run the actual entrypoint program from the container’s terminal to determine the root cause of the issue.
If the container is already running, to get a shell inside the container to perform additional operations, use the command: docker exec [service_cont_name] /bin/bash or docker exec -it [cont_name] /bin/bash
For example: docker-exec -it ia_data_analytics /bin/bash
Debugging Video Ingestion Through gst-launch
GStreamer Valid Plugins / Element
There is attribute named “pipeline” in the EII ConfigMgr for VideoIngestion. This attribute is used to mention the source of the video frame. For example:
“pipeline”: “rtspsrc location="rtsp://localhost:8554/" latency=100 ! rtph264depay ! h264parse ! mfxdecode ! videoconvert ! appsink”.
The bold text in the above example are the GStreamer element/plugins.
A list of valid GStreamer plugins or elements can be found at
To know which plugins are installed, use the command gst-inspect-1.0. This command will display all installed plugins.
Debugging the Video Ingestion Container
Note
These steps should only be followed if pipeline has been modified by the SI.
If the SI modifies the value of the pipeline attribute (an attribute from the factory.json file) which causes video ingestion to stop working, use the gst-launch-1.0 command inside the video ingestion container. To get the granular logs from this command line utility, set the environment variable GST_DEBUG. The value can range from 1 to 5.
For example, consider a case in which the video_str attribute has been modified. The new value has an invalid GStreamer element or plugin, say:
rtspsrc location="rtsp://localhost:8554/" latency=100 ! rtph264depay ! h264parse123 ! avdec_h264 ! videoconvert ! appsink
Consequently, video ingestion starts showing:
2019-05-22 01:12:14,387 : ERROR : algos.dpm.ingestion.video : [video.py] :_run : in line : [183] : Failed to retrieve frame from camera cam_serial3
2019-05-22 01:12:14,388 : ERROR : algos.dpm.ingestion.video : [video.py] :_run : in line : [183] : Failed to retrieve frame from camera cam_serial1
In this example, h264parse123 is not a valid GStreamer plugin or element.
To debug this issue:
Go inside the container using the command: docker exec -it -u root ia_video_ingestion bash
Set the GST_DEBUG variable (“export GST_DEBUG=3”).
Use the below command and examine the logs.
gst-launch-1.0 rtspsrc location="rtsp://localhost:8554/" latency=100 ! rtph264depay ! h264parse123 ! avdec_h264 ! videoconvert ! appsink
The bold text in the command above is exactly the value of the pipeline attribute. Since, h264parse123 is not a valid GStreamer plugin or element, using the above command will result in a log with the following ERROR messages.
0:00:00.018350108    85       0xe31750 ERROR           GST_PIPELINE grammar.y:716:priv_gst_parse_yyparse: no element "h264parse123"
0:00:00.018434694    85       0xe31750 ERROR           GST_PIPELINE grammar.y:801:priv_gst_parse_yyparse: link has no sink [source=@0xe44080]
0:00:00.018473162    85       0xe31750 ERROR           GST_PIPELINE grammar.y:716:priv_gst_parse_yyparse: no element "avdec_h264"
0:00:00.018497100    85       0xe31750 ERROR           GST_PIPELINE grammar.y:801:priv_gst_parse_yyparse: link has no source [sink=@(nil)]
0:00:00.019408613    85       0xe31750 ERROR           GST_PIPELINE grammar.y:801:priv_gst_parse_yyparse: link has no source [sink=@0xe50f30]
WARNING: erroneous pipeline: no element "h264parse123"
Therefore, using the gst-launch-1.0 command line utility has revealed that there is no h264parse123. Now we need to check whether the plugin is valid and whether it has been installed. The gst-inspect-1.0 command can be used to check whether the plugin has been installed.
Enablement of X11 Forwarding for EII Visualizer Container
In EII, ia_visualizer is a reference application that visualizes the video analytics results. For simplicity, its X11 GUI output is defaulted to display on localhost:0, the console. However, this can cause problems on headless devices or devices where a developer does not have physical/virtual access to the console.
When a user does SSH with X11 forwarding enabled, for example, with the -X option, and the user is using X11 (the DISPLAY environment variable is set), the connection to the X11 display is automatically forwarded to the remote side in such a way that any X11 programs started from the shell (or command) will go through the encrypted channel, and the connection to the real X server will be made from the local machine
Create a bash shell script and save it as Visualizer/startup.sh with the following content:
#!/bin/bash

if [ -n ${HOSTXAUTH} ] && [ -f ${HOSTXAUTH} ]
then
if [ -n ${XAUTHORITY} ]
then
    [ -f ${XAUTHORITY} ] || touch ${XAUTHORITY}
    xauth -inf ${HOSTXAUTH} nlist | sed -e 's/^..../ffff/' | xauth -f ${XAUTHORITY} nmerge -
fi
fi

python3.6 ./visualize.py
Set the execution permission
$ chmod 744 startup.sh
In Visualizer/Dockerfile add the bold section
# Installing dependencies
RUN apt-get install -y python3.6-tk

RUN apt-get install -y xauth

COPY requirements.txt .
RUN pip3 install -r requirements.txt

COPY visualize.py .

COPY startup.sh .

#Removing build dependencies
At the end of the Visualizer/Dockerfile, comment out the line that starts visualize.py and run startup.sh instead
#ENTRYPOINT ["python3.6", "visualize.py"]
ENTRYPOINT ["bash", "./startup.sh"]
Open the build/docker-compose.yml, update below parameter under ia_visualizer section
EII_UID: ${ EII_UID}
EII_USER_NAME: ${ EII_USER_NAME}
#read_only: true
image: ${DOCKER_REGISTRY}ia_visualizer:${ EII_VERSION}

volumes:
- "${ EII_INSTALL_PATH}/saved_images:${ EII_INSTALL_PATH}/saved_images"
- "vol_eii_socket:${SOCKET_DIR}"
#user: ${EII_UID}

environment:
    AppName: "Visualizer"
    #DISPLAY: ":0"
    DISPLAY: $DISPLAY
    HOSTXAUTH: "/tmp/host-xauth"
    XAUTHORITY: /tmp/.Xauthority
In the volumes section add the line in bold below. This mounts the .Xauthority file from the host to the running container.
volumes:
- "${EII_INSTALL_PATH}/saved_images:${EII_INSTALL_PATH}/saved_images"
- "/tmp/.X11-unix:/tmp/.X11-unix"
- "vol_eii_socket:${SOCKET_DIR}"
- "${HOME}/.Xauthority:/tmp/host-xauth:ro"
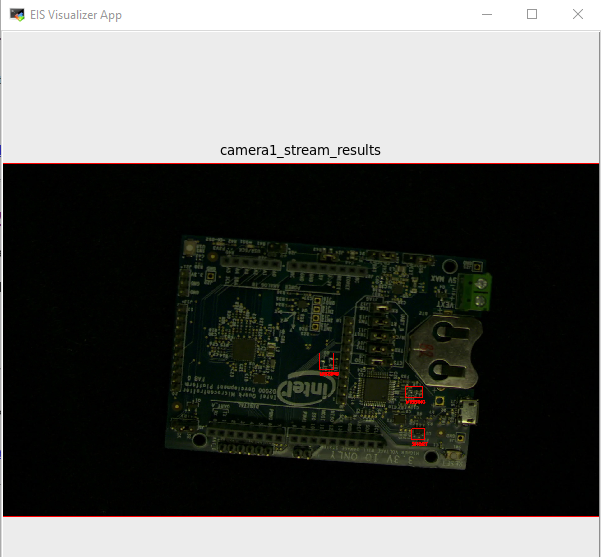
This concept has been tested and verified in single-node as well as multi-node setups. Note that it takes a live SSH connection and valid X11 authorization cookies on both ends, local and remote, for this to work, this SSH connection must be kept alive during the time you want your Visualizer to run. If the SSH connection can’t be established or is torn down in the middle of operation, errors are thrown from the Visualizer container. Below is the example of the EII Visualizer App.
Debugging options
To check if all the EII images are built successfully, use cmd:
docker images|grep iaand to check if all containers are running, use cmd:docker ps(one should see all the dependency containers and EII containers up and running). If you see issues where the build is failing due to non-reachability to Internet, please ensure you have correctly configured proxy settings and restarted docker service. Even after doing this, if you are running into the same issue, please add below instrcutions to all the dockerfiles inbuild\dockerfilesat the top after the LABEL instruction and retry the building EII images:ENV http_proxy http://proxy.iind.intel.com:911 ENV https_proxy http://proxy.iind.intel.com:911
docker psshould list all the enabled containers which are included in docker-compose.ymlTo verify if the default video pipeline with EII is working fine i.e., from video ingestion->video analytics->visualizer, please check the visualizer UI
/opt/intel/eiiroot directory gets created - This is the installation path for EII:data/- stores the backup data for persistent imagestore and influxdbsockets/- stores the IPC ZMQ socket files
Note:
Few useful docker-compose and docker commands:
docker-compose -f docker-compose-build.yml build- builds all the service containers. To build a single service container, usedocker-compose -f docker-compose-build.yml build [serv_cont_name]docker-compose down- stops and removes the service containersdocker-compose up -d- brings up the service containers by picking the changes done indocker-compose.ymldocker ps- check running containersdocker ps -a- check running and stopped containersdocker stop $(docker ps -a -q)- stops all the containersdocker rm $(docker ps -a -q)- removes all the containers. Useful when you run into issue of already container is in use.
If you want to run the docker images separately i.e, one by one, run the command
docker-compose run --no-deps [service_cont_name]Eg:docker-compose run --name ia_video_ingestion --no-deps ia_video_ingestionto run VI container and the switch--no-depswill not bring up it’s dependencies mentioned in the docker-compose file. If the container is not launching, there could be some issue with entrypoint program which could be overrided by providing this extra switch--entrypoint /bin/bashbefore the service container name in the docker-compose run command above, this would let one inside the container and run the actual entrypoint program from the container’s terminal to rootcause the issue. If the container is running and one wants to get inside, use cmd:docker-compose exec [service_cont_name] /bin/bashordocker exec -it [cont_name] /bin/bashBest way to check logs of containers is to use command:
docker logs -f [cont_name]. If one wants to see all the docker-compose service container logs at once, then just rundocker-compose logs -f
Enabling Secure boot
The deployment machine with EII is recommended to be enabled with secure boot for full security.
For enabling secure boot with Ubuntu, please refer to : https://wiki.ubuntu.com/UEFI/SecureBoot
Note
With the secure boot enabled, the boot image and kernel will be verified and post that the system administrator / root user will be the security gatekeeper. The admin must ensure that the root credentials are not compromised.