Getting Started
Minimum System Requirements
The following are the minimum system requirements to run Intel® Edge Insights System:
System Requirement |
Details |
|---|---|
Processor |
11th generation Intel® CoreTM processor onwards with Intel® HD Graphics or Intel® Xeon® processor |
RAM |
Recommended 64 GB |
Hard drive |
Recommended 256 GB |
Operating system |
Ubuntu 22.04 |
The Intel(R) Edge Insights System stack is been validated on the below Industrial PC (IPC) systems:
Vendor |
Model |
System Config |
|---|---|---|
Axiomtek |
IPC 960 |
Intel® 11th Gen TGL Core™ i7-1185G7E - 64GB (2x32GB) DDR4 256GB PCIe NVMe M.2 SSD |
Advantech |
MIC 770 V3 |
Intel® 12th Gen ADL Core™ i7-12700E - 64GB DDR5 (2x32GB) 256GB PCIe NVMe M.2 SSD |
Onlogic |
Karbon 803 |
Intel® 12th Gen ADL Core™ i9-12900T - 64GB (2x32GB) DDR4 1TB M.2 SSD |
Install Intel® Edge Insights System
This section provides information for the following:
Prepare your target system.
Copy the Intel® Edge Insights System package.
Complete the installation steps.
Note
During the installation, you will be prompted to enter your product key. This key is in the email that you received from the Intel® Registration Center. Contact the Support Forum if you do not have this email message.
Be aware that screenshots may show a package version number that is different from the current release. For information on the current release, see the Release Notes.
Step 1: Prepare the Target System
Ensure that the target system has a fresh installation of Ubuntu* Linux. The Ubuntu* Linux version should correspond to the version of Intel® Edge Insights System that you downloaded.
If you need help with installing Ubuntu* Linux, follow these steps:
Download Ubuntu* Linux* Desktop ISO file to your developer workstation.
Use an imaging application to create a bootable flash drive.
Turn off the target system, insert the USB flash drive, and power on the system.
If the target system doesn’t boot from the USB flash drive, change the boot priority in the system BIOS.
Follow the prompts to install Ubuntu* Linux with the default configurations. For detailed instructions, see the Ubuntu guide.
Power down your target system and remove the USB drive.
Power up the target system. You will see Ubuntu* Linux is successfully installed.
Step 2: Download and Copy the Intel® Edge Insights System.zip File to the Target System
In this step, you download the Intel® Edge Insights System package and copy Intel® Edge Insights System to your target system.
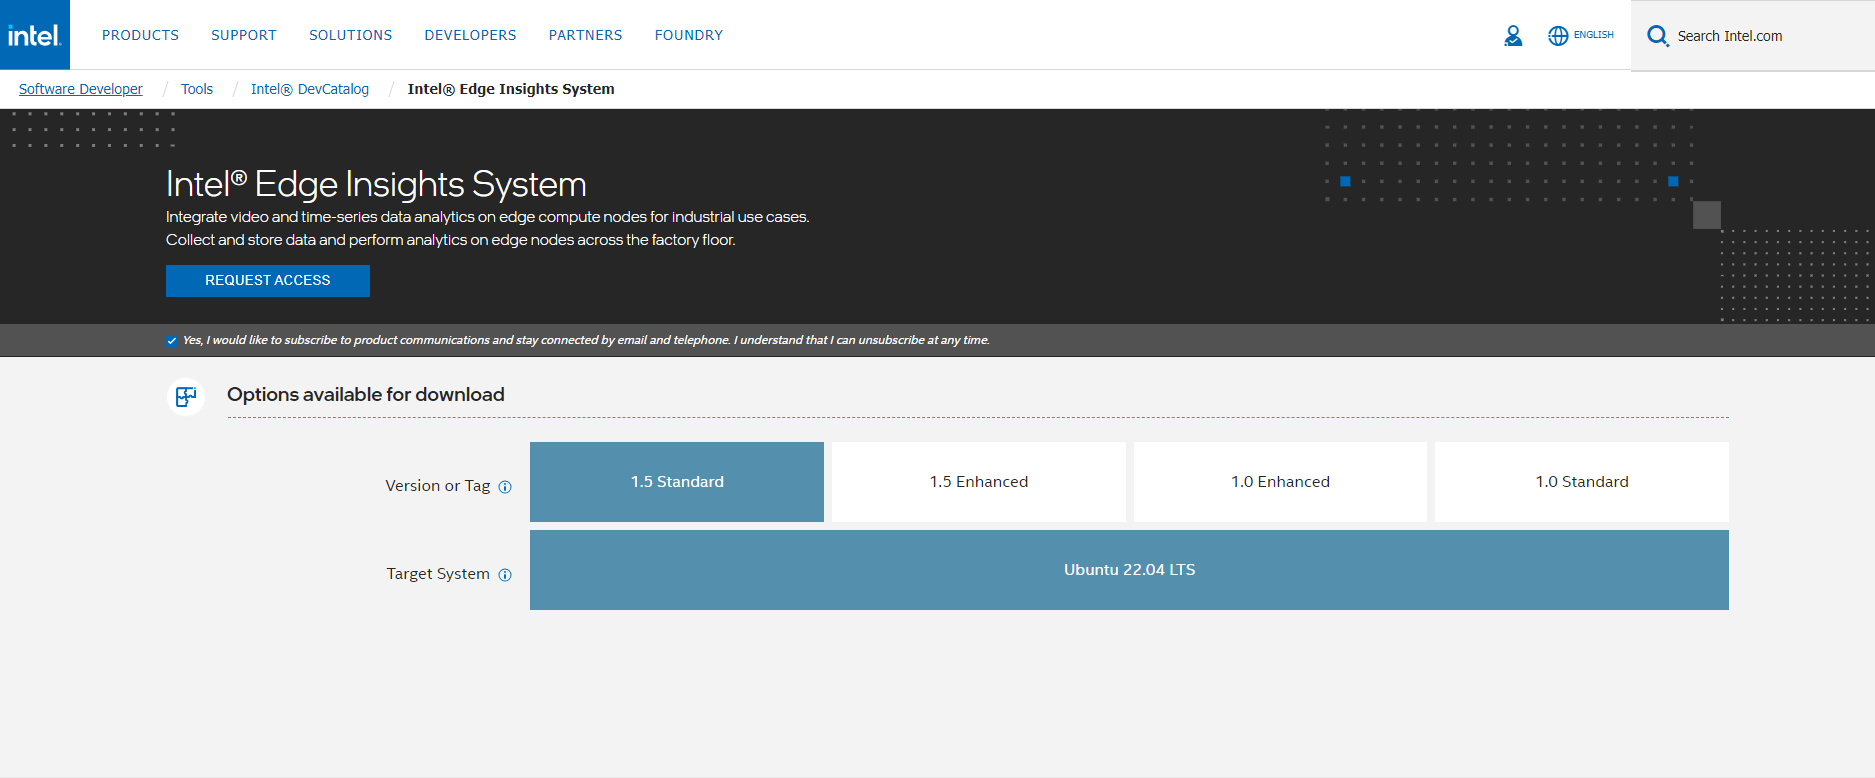
Open page Intel® Edge Insights System package from browser.
You will see 2 variants Standard and Enhanced. Select the one you want to download and click on the request access option as shown below.
Note
Standardvariant supports vision analytics pipeline use case.Enhancedvariant supports vision and timeseries analytics pipeline use case.
You will receive email when you click on the
Request Accessoption.Once the access request gets approved, you will receive mail having the Product key to download the package.
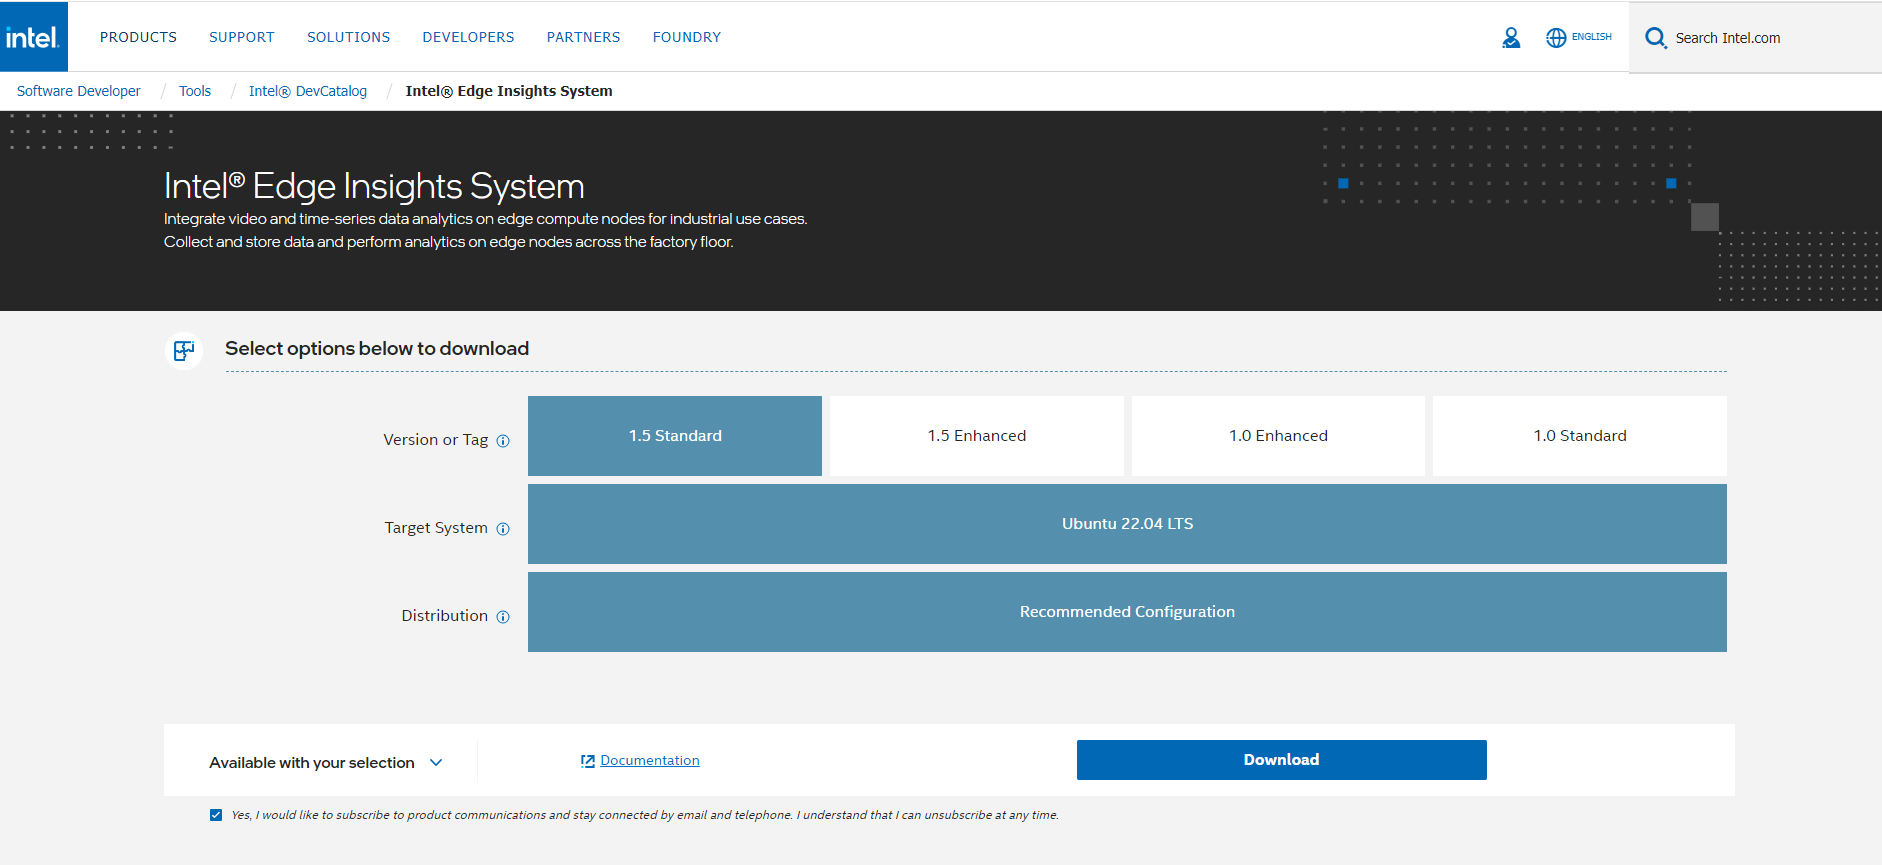
Download the Intel® Edge Insights System package.
Copy
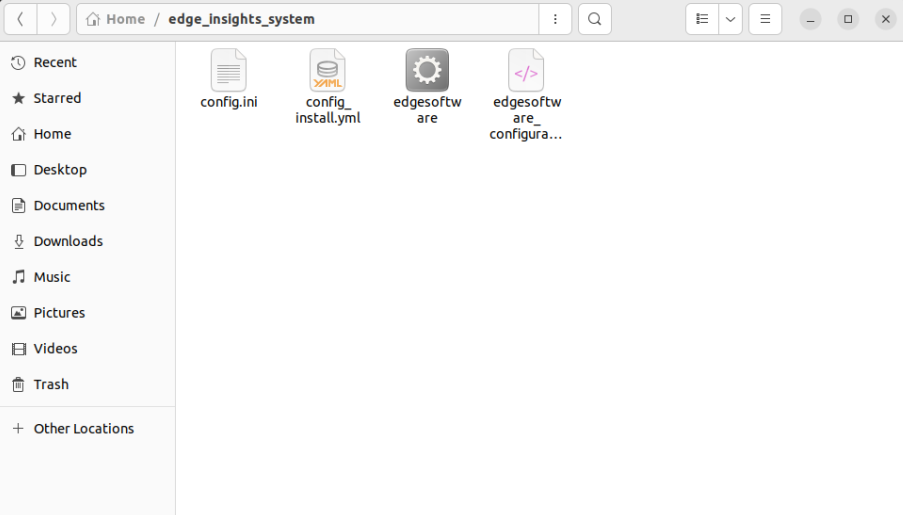
edge_insights_system.zipfrom the developer workstation to the Home directory on your target system. You can use a USB flash drive to copy the file. The icon looks like this:
Step 3: Extract the Intel® Edge Insights System Software
In this step you extract the edge_insights_system.zip file. You need to be on the target system to complete the following steps:
Step 4: Configure your Installation
The config_install.yml contains information about the modules to install. You can modify this file and configure the installation behavior of the
components in your target system.
Note
This step is mandatory for Intel® Edge Insights System installation.
Ensure that you update the
etcd root_password, influxdb_username, influxdb_password, minio_access_key,minio_secret_keyandcvat_superuser_passwordas this is required for the Intel® Edge Insights System installation.
Based on your requirements, modify the
config_install.ymlfile. For more information, refer to the following table:
Key |
Value and Description |
|---|---|
dev_mode |
This key is used to set the installation mode. You can set the key value as follows:
|
remove_previous_eii |
Set this key value as true to remove any existing containers of Intel® Edge Insights System from the previous installation. |
etcd root_password |
This key’s value updates the etcdroot password credential. |
influxdb_username |
If the downloaded edgesoftware_configuration.xml file contains the DataStore module, then you must set the username credential value. Do not use the following special characters in the influxdb_username |
influxdb_password |
If the downloaded |
minio_access_key |
If the downloaded edgesoftware_configuration.xml file contains the DataStore module, then you must set the value for the access key credential. Note that the minio_access_key length must be a minimum of 8 characters. |
minio_secret_key |
If the downloaded |
cvat_superuser_password |
If you have downloaded the |
Based on your requirement, configure Intel® Edge Insights System in any of the following mode:
Development mode (DEV mode)—this mode eases the development phase for System Integrators (SI).
Production mode (PROD mode)—this mode allows you to perform production programming tasks.
To configure Intel® Edge Insights System, you can customize the working environment variables in the
.envfile. The.env fileis in the[WORK_DIR]/$HOME/edge_insights_system/IntelR_Edge_Insights_System__<version>/IEdgeInsights/buildfolder.
Step 5: Install the Intel® Edge Insights System Software
Note
If you are using a proxy server, then ensure that the proxy settings are configured correctly. The edgesoftware tool uses the proxy settings to download and install the modules.
For using Enhanced package behind proxy environment, please ensure to add 172.17.0.1 to the no_proxy env value in /etc/environment or via network settings, this way one could be able to access CVAT UI via the browser
The software installation can take 1 to 3 hours depending on the package you chose. The completion time depends on your target system configuration and the speed of the Internet connection.
If you encounter any Docker* pull-related issues during the installation process, refer to the Troubleshooting section.
Please make sure that the system time is up-to-date before installing via edgesoftware. For more details on instruction to synchronizing the system clock with ntp, please refer to the Troubleshooting section
You will now run a script to download components and install Intel® Edge Insights System on your target system. Complete the following:
Run the following commands:
cd edge_insights_system/
chmod 775 edgesoftware
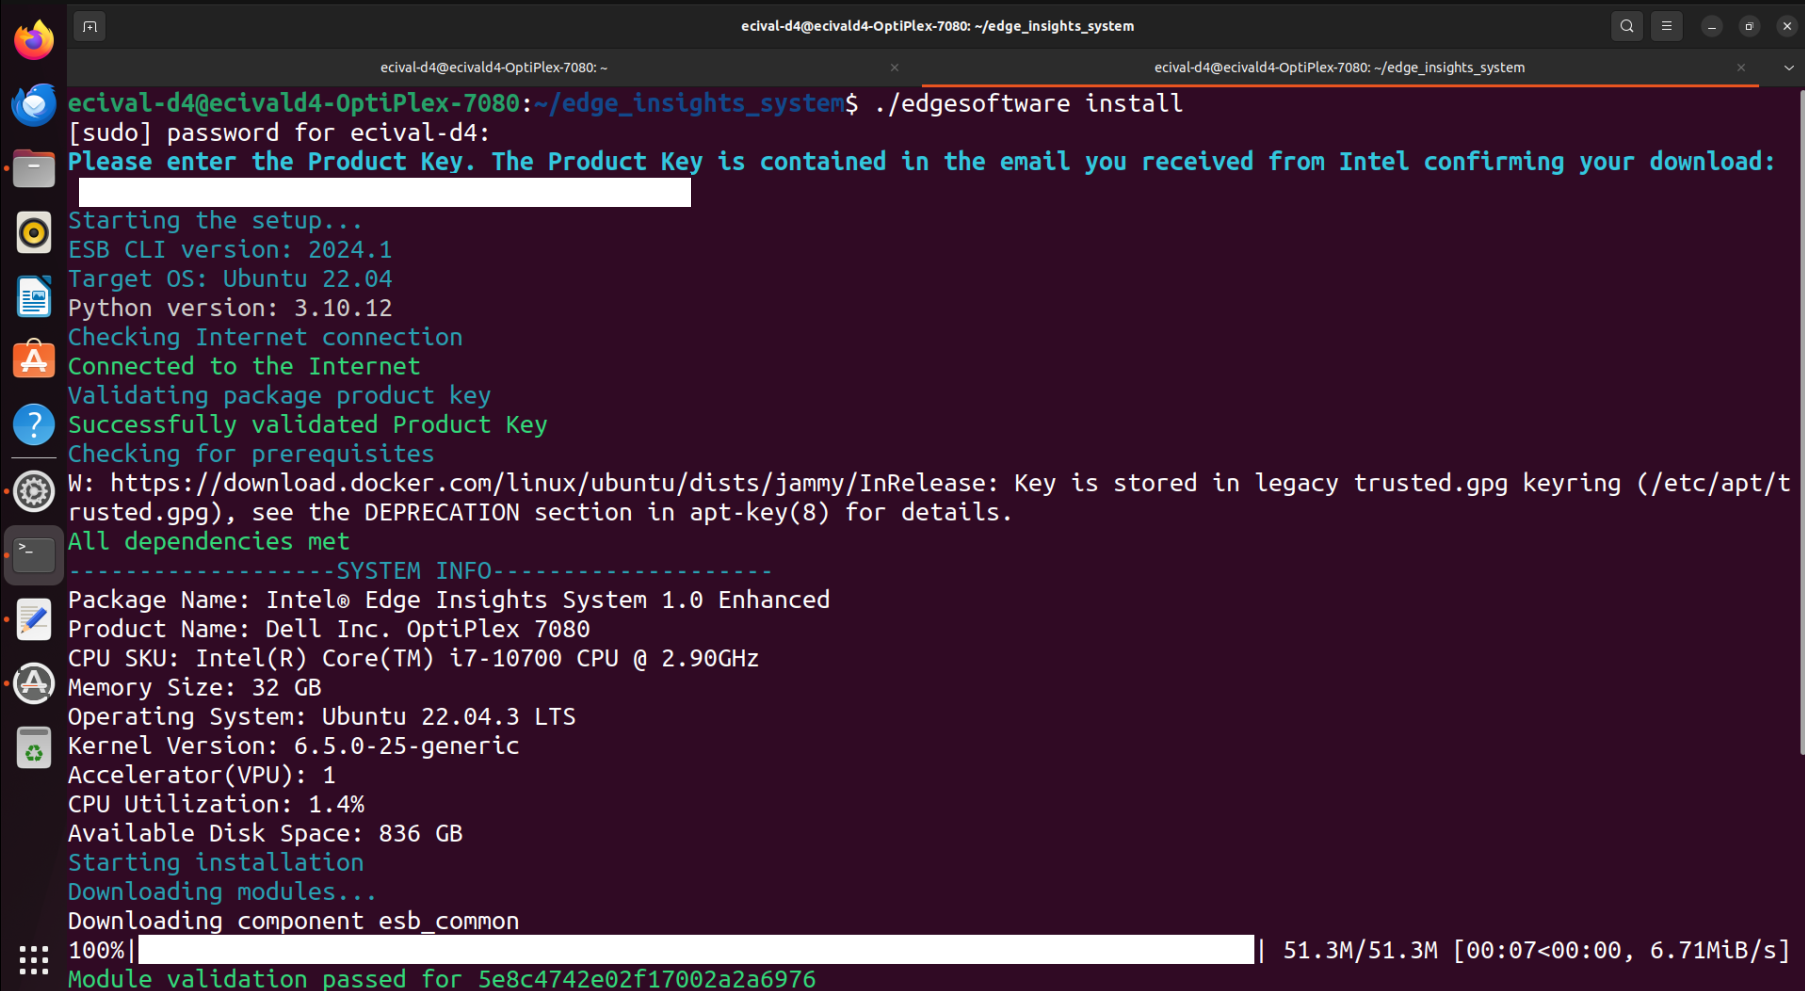
./edgesoftware install
Note
Ensure valid parameters added in
config_install.ymlfile prior running the command./edgesoftware install.If any download errors are found due to some network interruptions, please retry the
./edgesoftware installfor the download and installation to complete.If
./edgesoftware installcommand fails because of not being able to pull the container image, please retry by re-running thesudo ./edgesoftware installcommand. Once the installation is successful, please run command:sudo chown -R $USER:$USER IntelR_Edge_Insights_System_<version>to update the file ownership to the current user and please reboot the system once to activate the current user addition to docker group.
Note
Ensure to enter the valid Product key that you have received in the email.
Based on components selected and system configuration, you might be
prompted for additional actions if you have not configured the
config_install.yml file correctly.
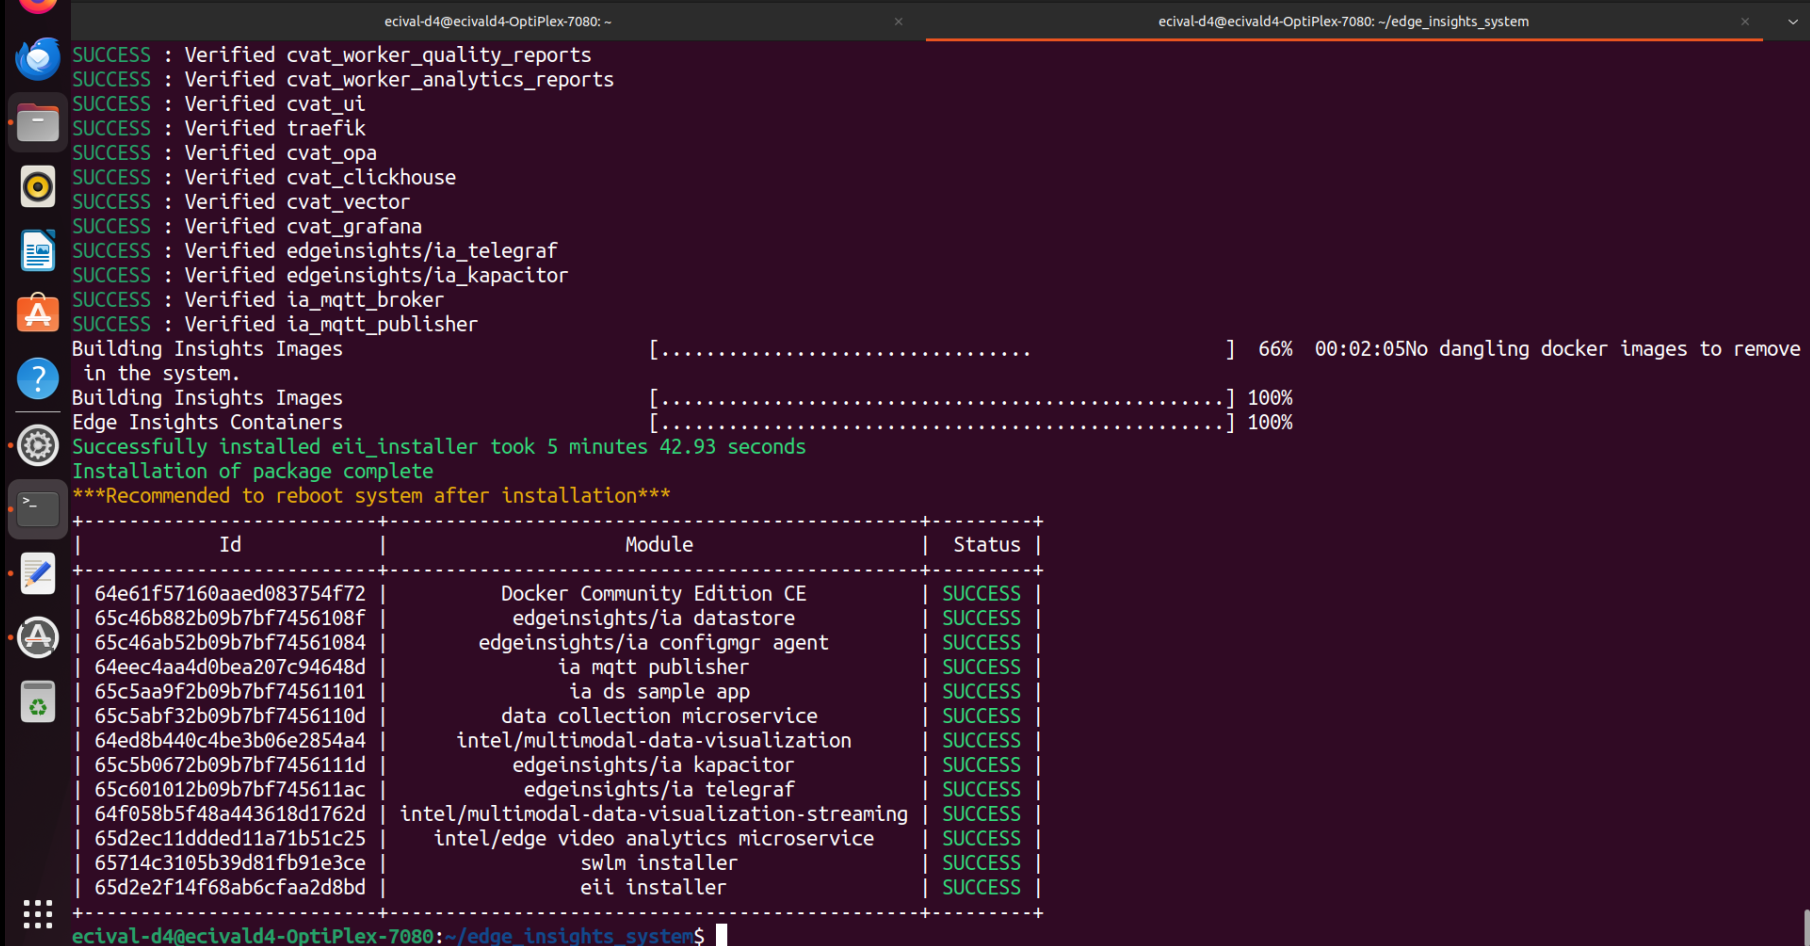
When the installation is complete, you see the
Installation of package complete message and the installation status for
each module. Refer to the following screenshot:
Note
You will see similar installation status for Intel® Edge Insights System Standard variant.
Step 6: Verifying the Intel® Edge Insights System by checking the visualization
Note
Skip this section, if you are running Intel® Edge Insights System in the DEV mode, the Visualizer is accessible at http://<HOST_IP>:3000
To import root cert in Visualizer, import cacert.pem from the build/Certificates/rootca/ directory to the browser certificates. Complete the following steps to import certificates:
In Chrome browser, go to Settings.
In Search settings, enter Manage certificates.
In Privacy and security, click Security.
On the Advanced section, click Manage certificates.
On the Certificates window, click the Trusted Root Certification Authorities tab.
Click Import.
On the Certificate Import Wizard, click Next.
Click Browse.
Go to the IEdgeInsights/build/Certificates/rootca/ directory.
Select the cacert.pem file, and provide the necessary permissions, if required.
Select all checkboxes and then, click Import.
How to use Visualizer’s Grafana
Complete the following steps to use Visualizer’s Grafana:
Use root as the Username and eii123 as the Password both for first login, password can be changed if required when prompted after logging in.
On the Home Dashboard page, on the left corner, click the Dashboards icon.
Click the Manage Dashboards tab, to view the list of all the preconfigured dashboards.
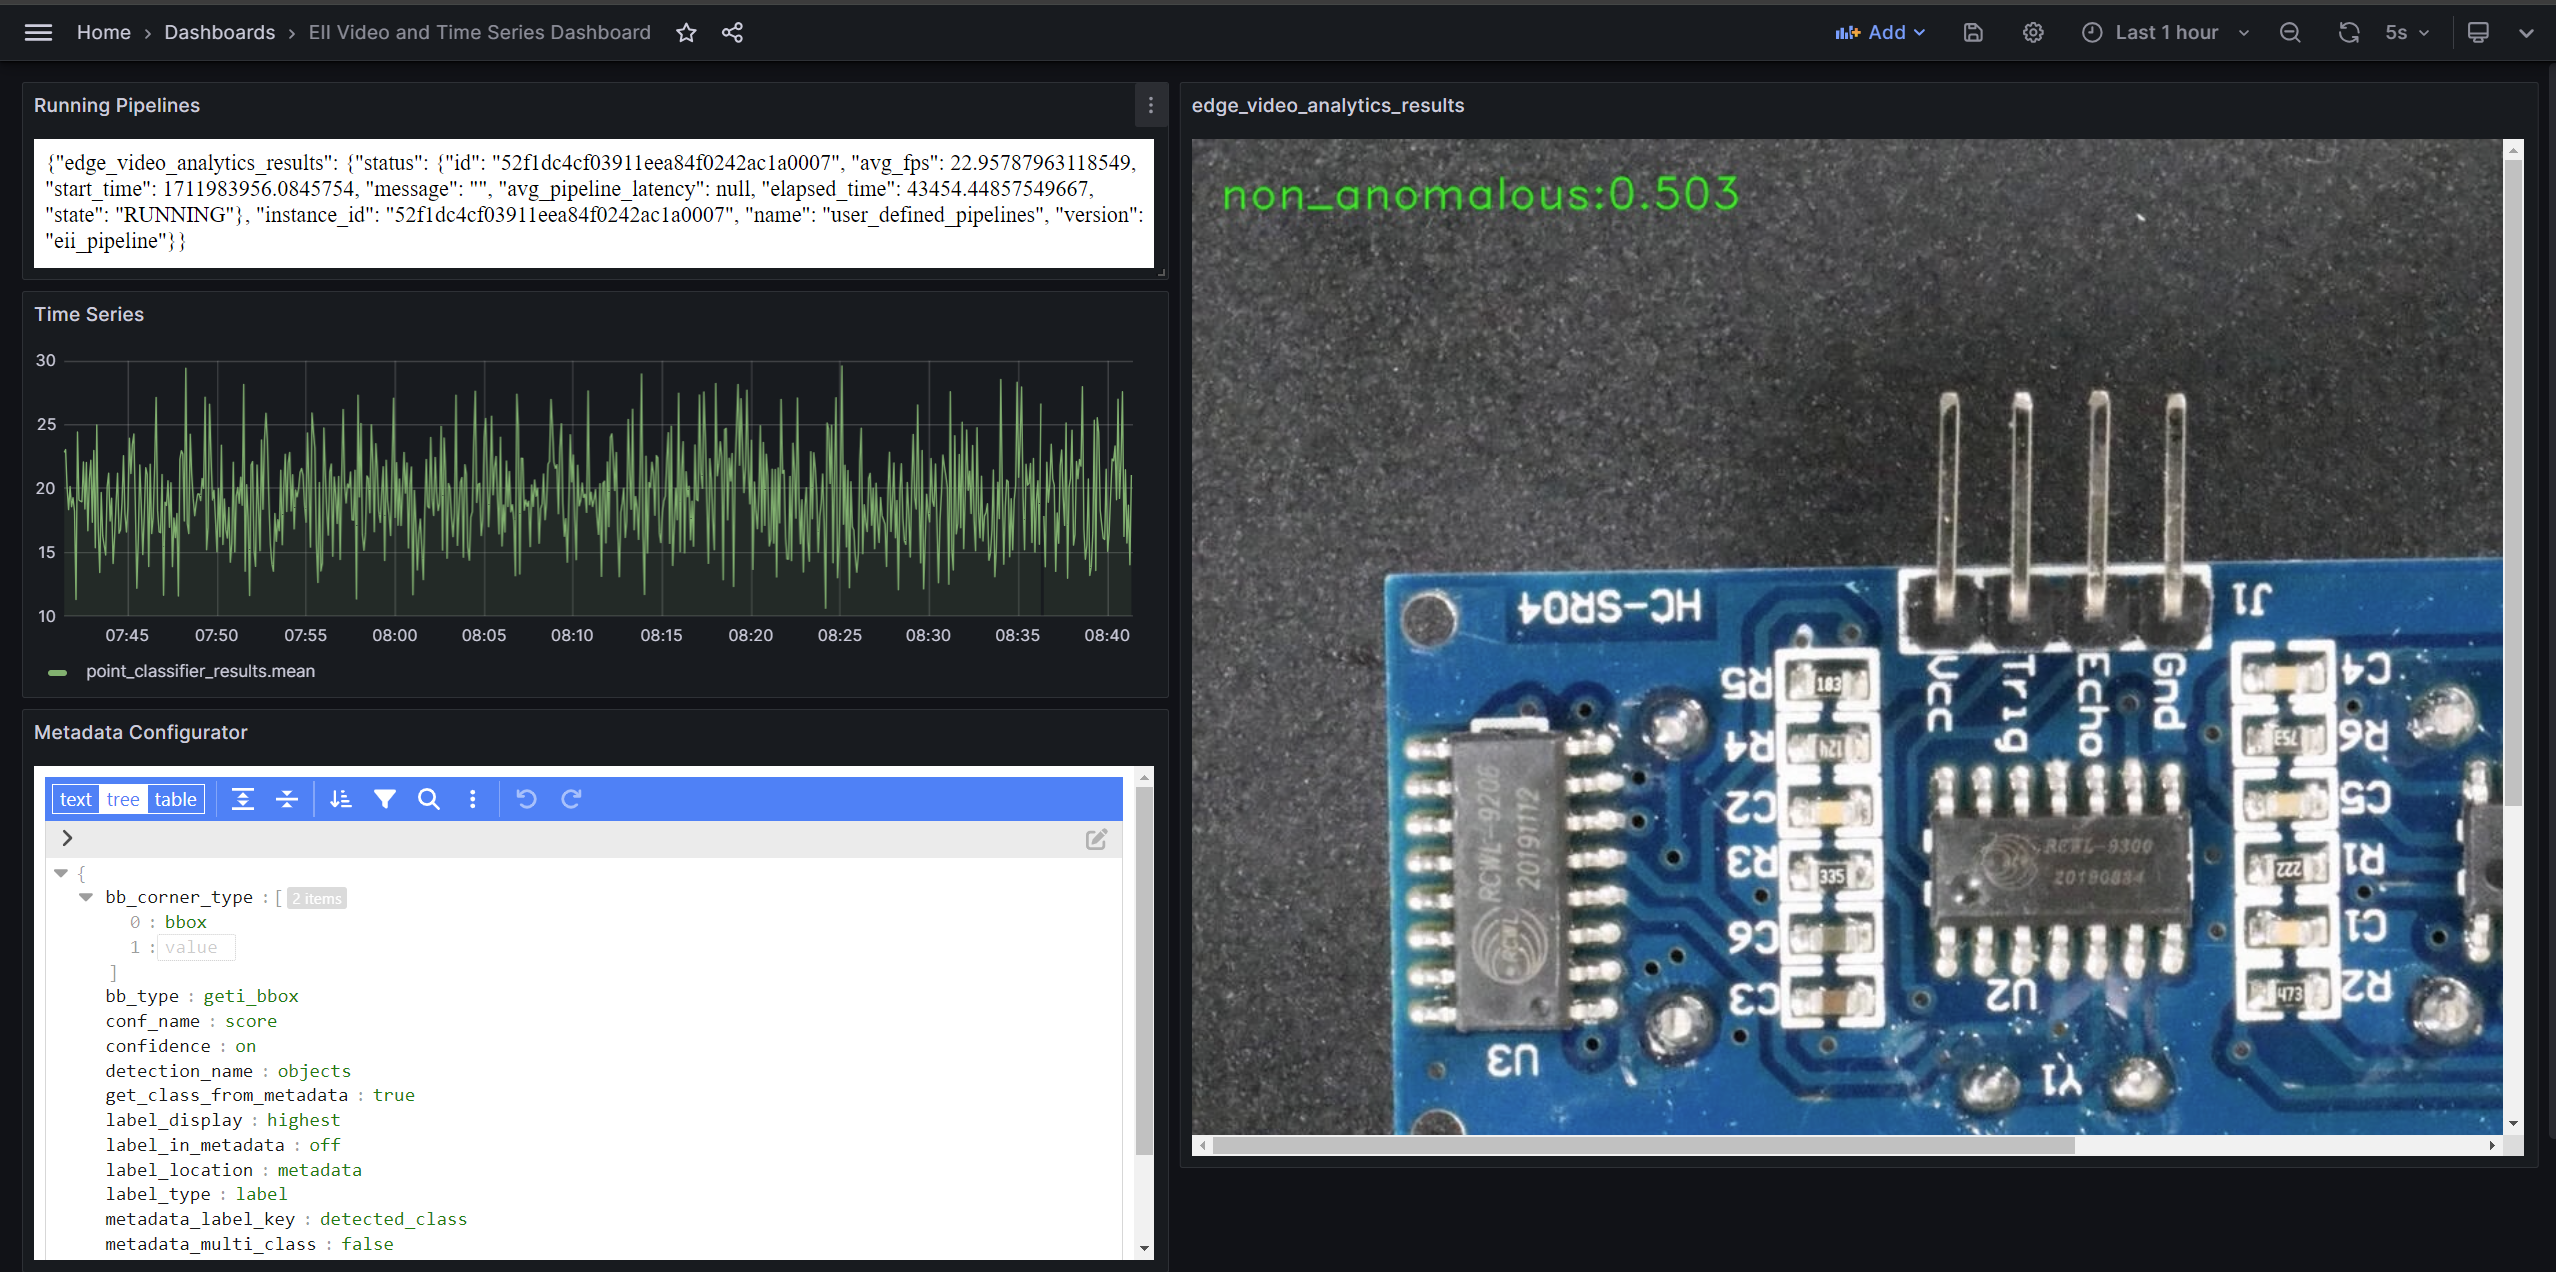
Select EII Video and Time Series Dashboard, to view multiple panels with topic names of the subscriber as the panel names along with a time-series panel named Time Series.
Hover over the topic name. The panel title will display multiple options.
Click View to view the subscribed frames for each topic.
Note
If you are launching Grafana from a different node then video streaming panel might not stream the video. Follow these steps to access visualizer from a different node.
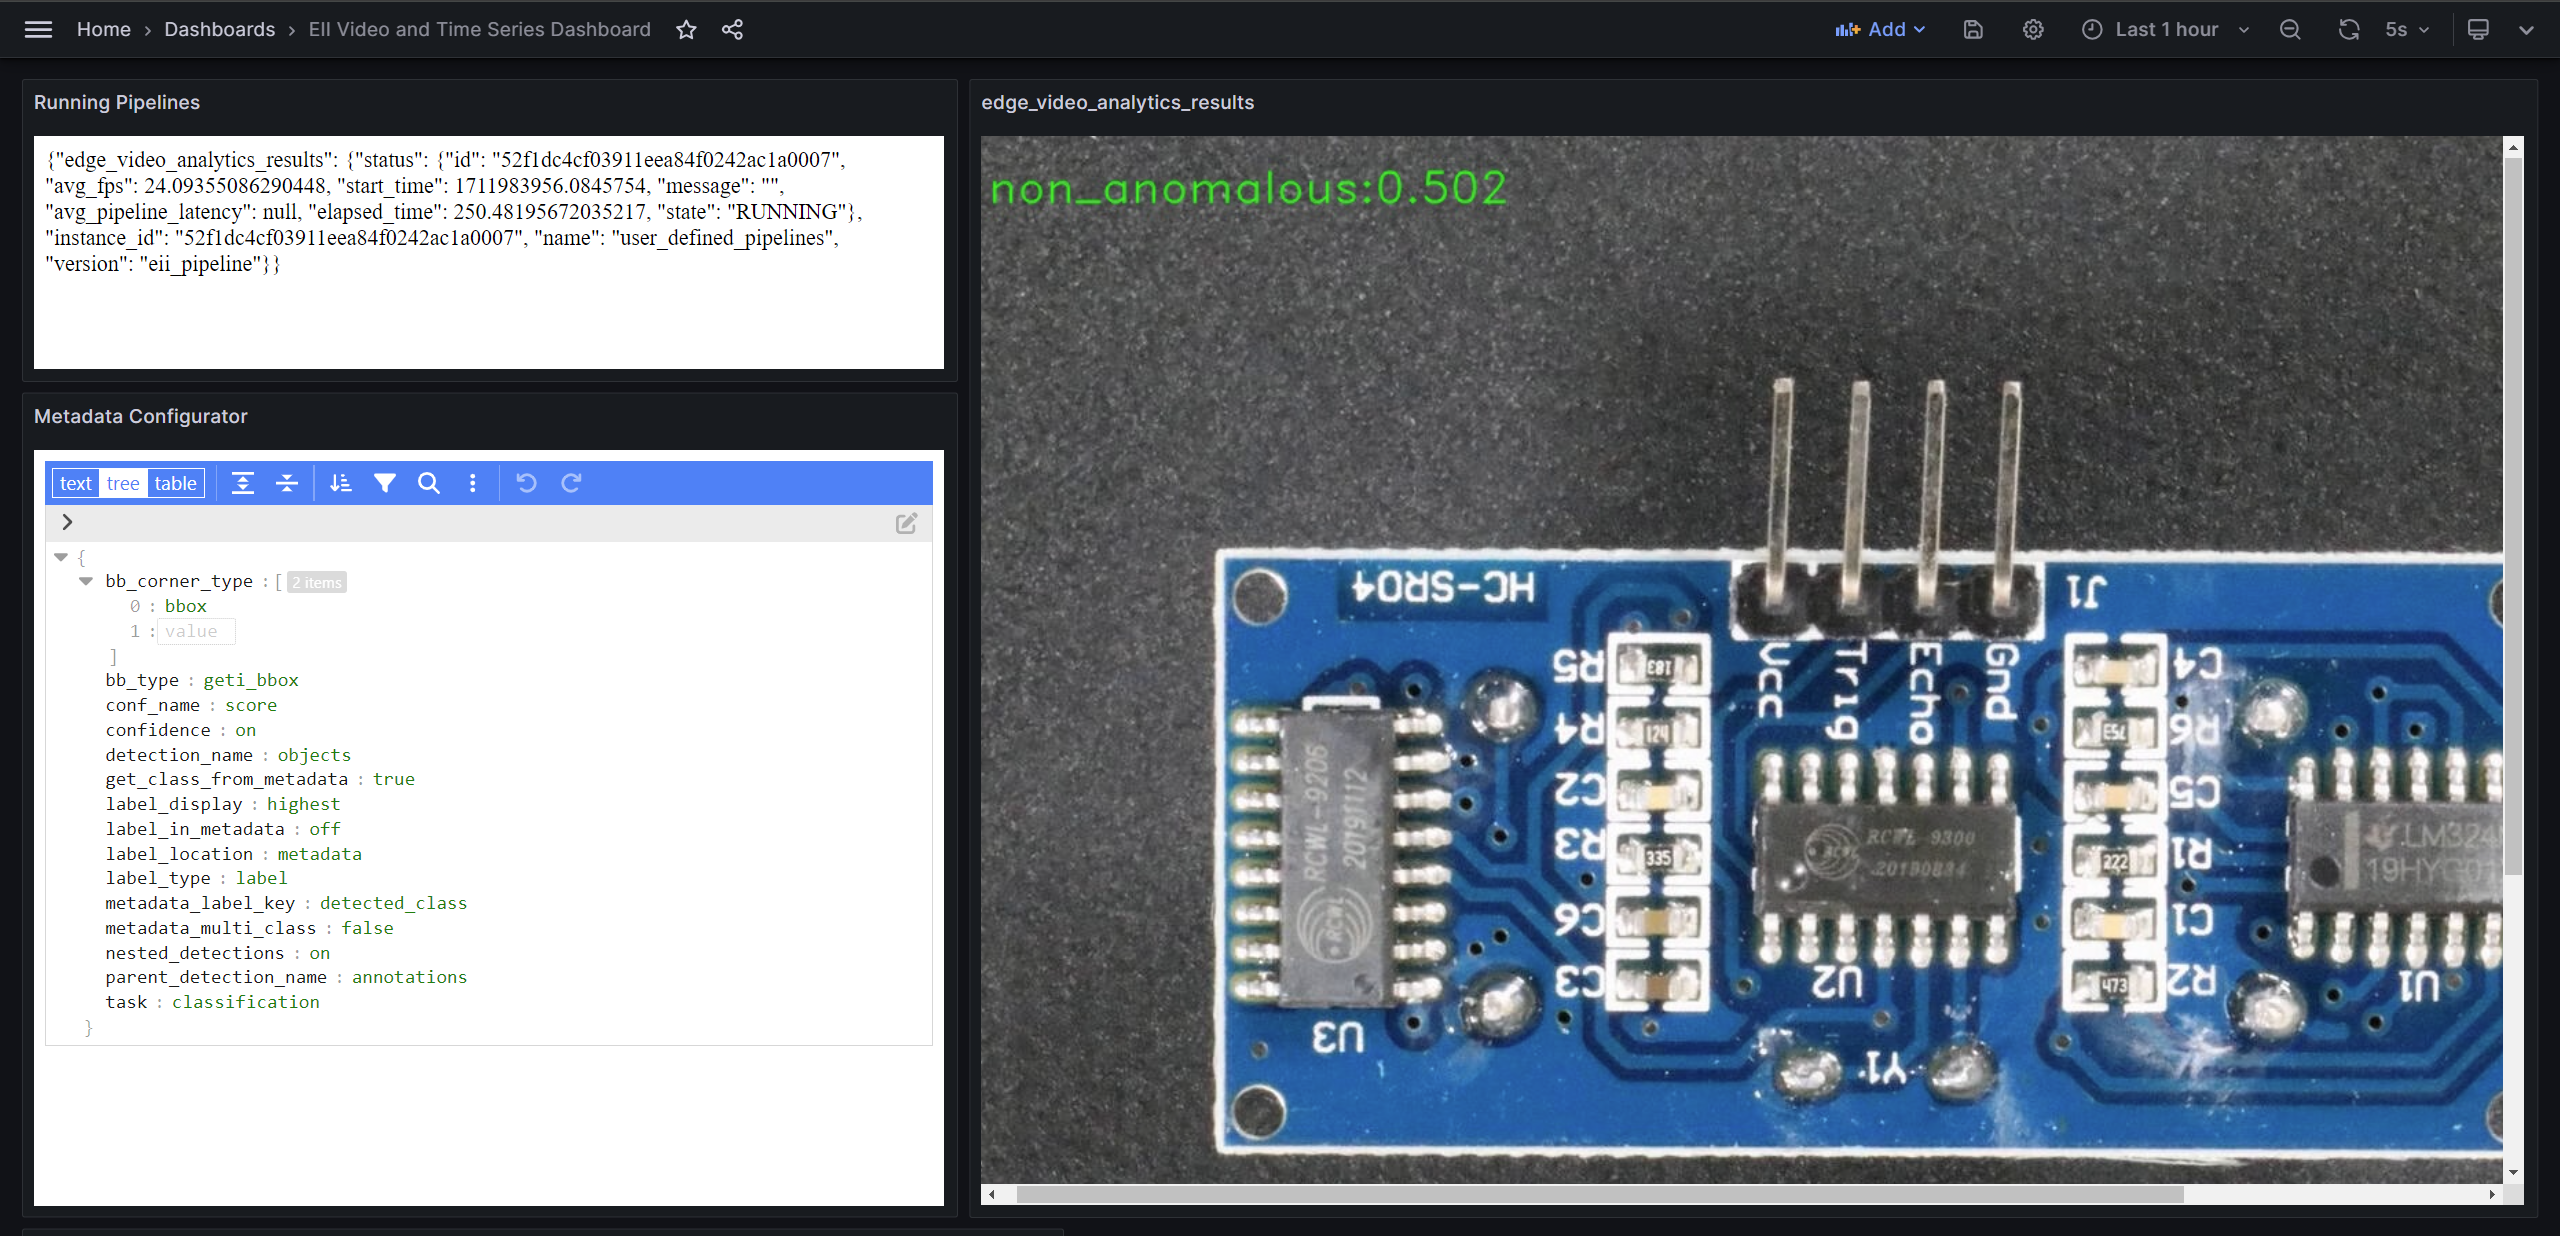
If you are using
Standardvariant, then you will see the below output for video usecase.If you are using
Enhancedvariant, then you will see the below visualization for video + time-series usecase.
Uninstall the Packages
The edgesoftware CLI lets you uninstall the complete package.
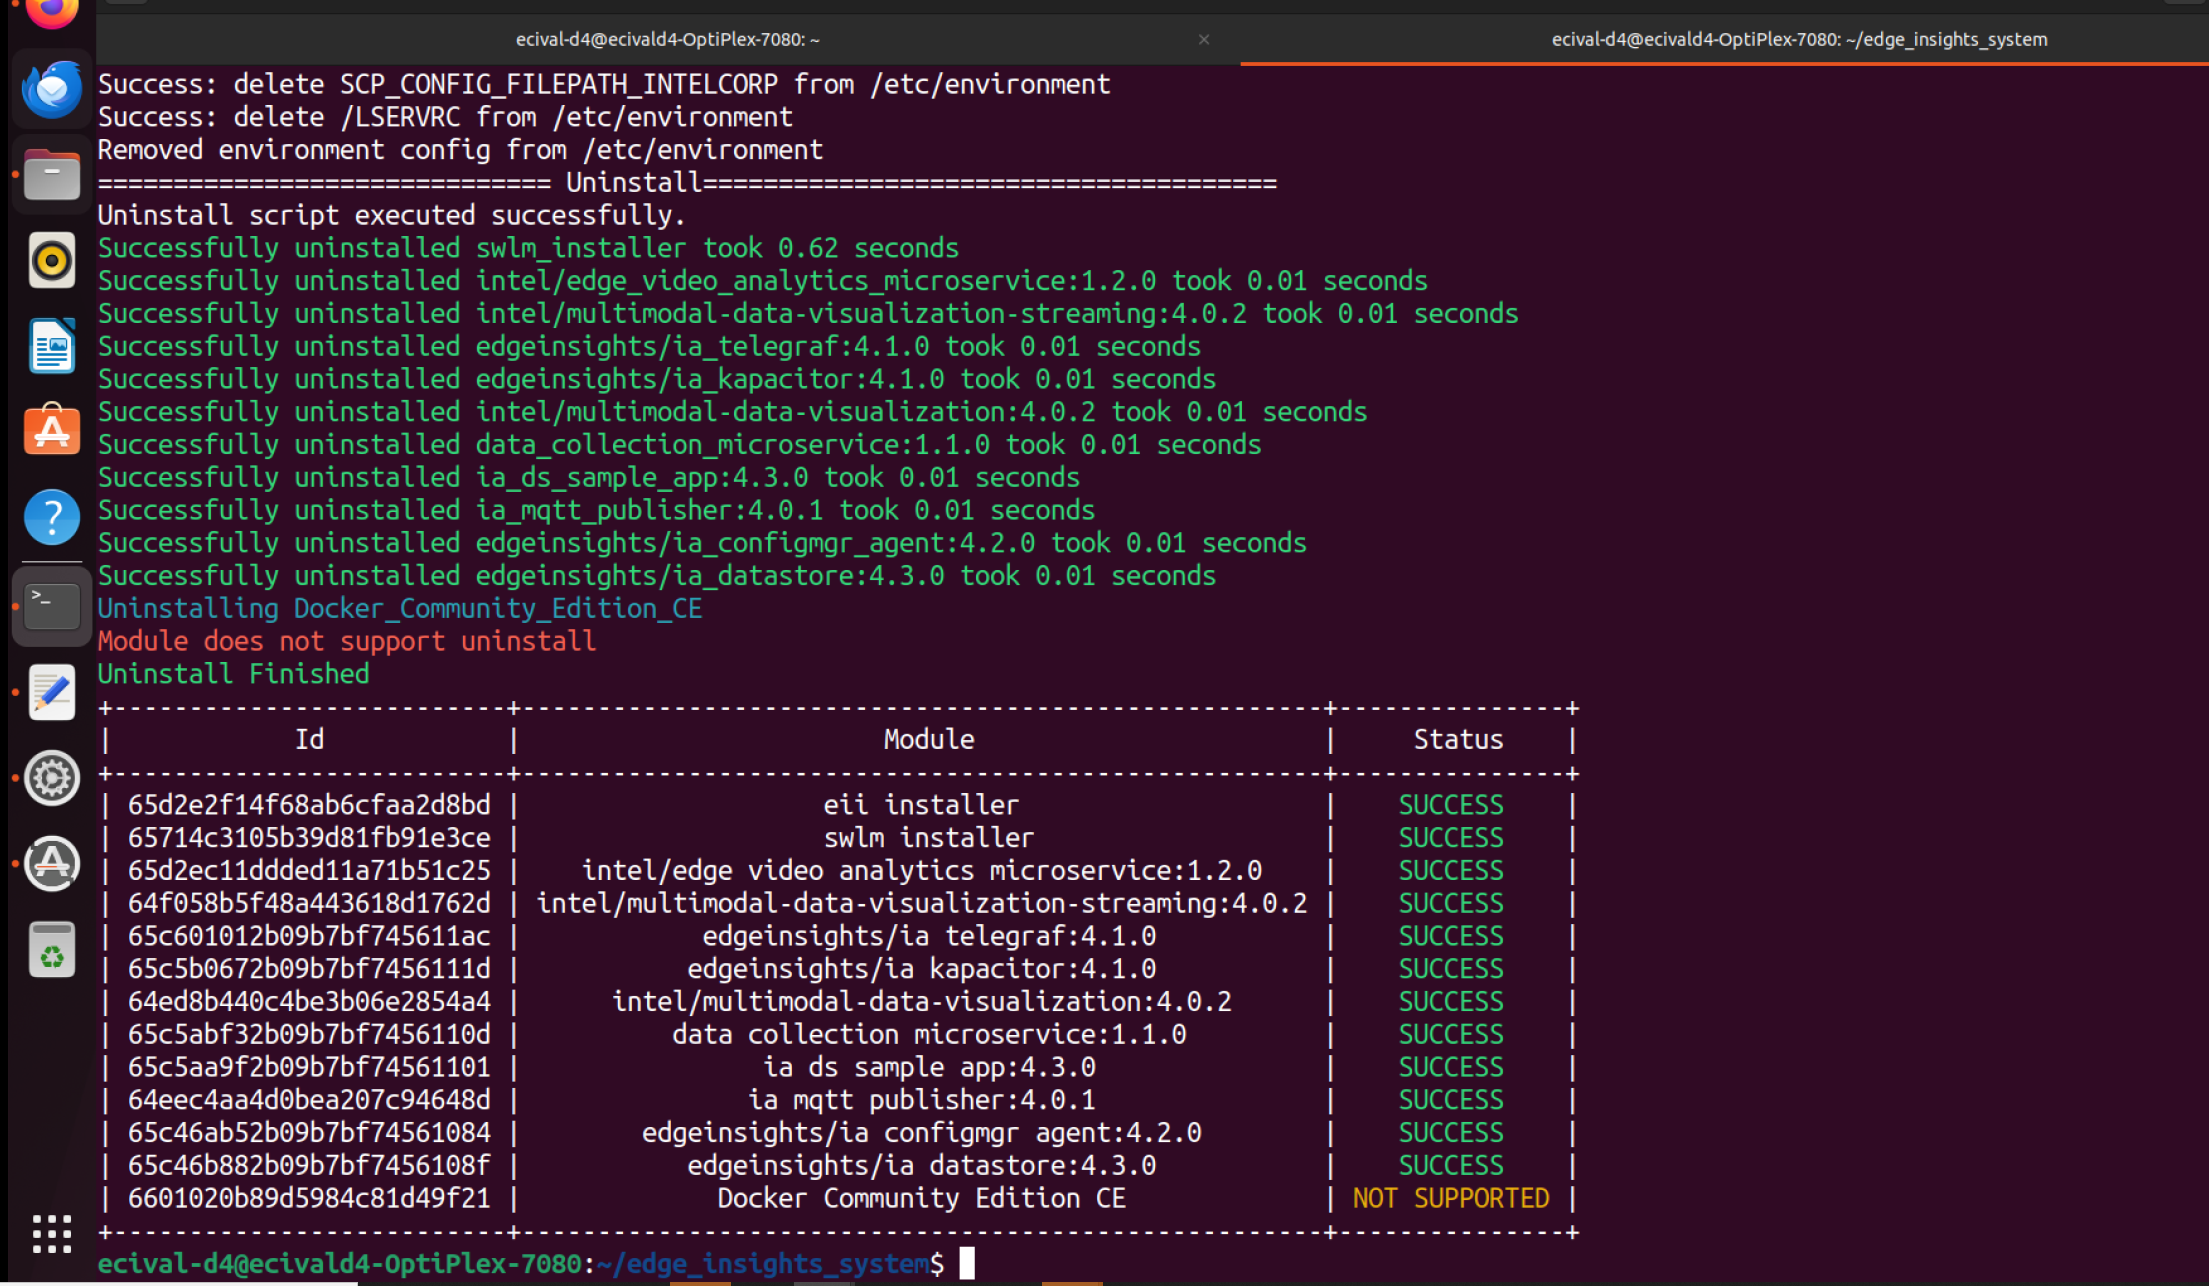
To uninstall all the packages, run the following command:
./edgesoftware uninstall -a
Note
The uninstall for Docker Community Edition CE is not supported.
Troubleshooting
This section provides information about troubleshooting and resolving installation-related issues.
Ensure that you have an active internet connection during the full installation. If you lose Internet connectivity at any time, the installation might fail.
If the installation gets stuck at some point then press
Enterkey to continue.If the Intel® Edge Insights System installer component fails to install after running the
./edgesoftware installcommand, then do the following:
Check the list of the running containers using the following command:
docker psCheck the logs of the failing containers to find the reason for the issue.
Note
Services such as DataStore, Visualizer etc., will fail, if the port is already used by other processes on the host machine as Intel® Edge Insights System uses docker host network. Ensure to free up that port and rerun the
./edgesoftware installcommand or do the following:Go to
edge_insights_system/IntelR_Edge_Insights_System_<version>/IEdgeInsights/buildwhere <version> indicates the downloaded version Standard or Enhanced of Intel® Edge Insights System.
Run the following command to relaunch services:
sudo sg docker -c docker compose up -d
Following are the instruction to synchronizing the system clock with network time servers using systemd-timesyncd.
Installation:
sudo apt update
sudo apt install systemd-timesyncd
Configuration: Start the systemd-timesyncd service:
sudo systemctl start systemd-timesyncd
Enable systemd-timesyncd to start automatically on boot:
sudo systemctl enable systemd-timesyncd
Check the status of systemd-timesyncd:
sudo systemctl status systemd-timesyncd
(Optional) Configure NTP servers: Modify the NTP option under the [Time] section to specify NTP server addresses.
This configuration change would be required when machine is running behind a proxy server and need to connect to a different ntp server in their corporate network
sudo nano /etc/systemd/timesyncd.conf
[Time]
NTP=<ntp_server_url>
Restart systemd-timesyncd if configuration changes were made:
sudo systemctl restart systemd-timesyncd
Verification: Check the synchronization status:
timedatectl
Docker Image Pull Issue
This issue cccurs due to the latest pull rate limitations introduced by Docker Hub.
Check this Docker site article to help determine the exact pull limit that’s applicable on the system where you are trying to pull the publicly available Docker Hub images, such as Docker, Python, etc.
Note
This limit is only applicable for the 6-hour window.
If this issue occurs for an anonymous user (without Docker login and with pull limit of 100), you can create an account and try to do the build after running the following command:
docker login -u <username> -p <password>
The alternative is to use a paid subscription.
If you’re unable to resolve your issues, go to the Support Forum.
